Douglas Miniatures Logo

Douglas Miniatures Logo

Saturday 29 December 2018

Action in the Denmark Straits 1941 - Battle Report

A few months back I purchased a copy of Bob Cordery's Gridded Naval Wargames:
Not really being a naval wargame buff, I was, however, enthused by the simplicity of these rules; so I decided to give it a go.  The rules are really written to play out late 19th and early 20th Century sea battles, but there is enough information for a good WW2 game.

I dug out my old 1/3000 scale ships that have never been used and decided to fight a limited action based upon the engagement between the Bismarck and Prinz Eugen against Hood and Prince of Wales.

The German ships are sailing on a south westerly course off the coast of Greenland, Prinz Eugen leading:
On the other side of the board, heading Northwest is Hood and Prince of Wales:
The two forces sight each other and Bismarck opens fire upon Hood with her main armament at extreme range:
Bismarck's 15" shells slam into Hood causing significant damage.

Both sides continue to close the range and the two British warships are able to engage with all of their main armament scoring a number of direct hits on Bismarck. In the same round Bismarck returns fire further damaging Hood.

In the next round the Germans turn to the east. This brings the guns of Prinz Eugen into range; her salvo causing some damage to Prince of Wales. 

However, both British ships fire at Bismarck again. Having found the range the impact of around 20 shells has a catastrophic effect on Bismarck and she is forced to break off the action.

Covered by Prinz Eugen, Bismarck turns away to the North. Prinz Eugen fires again and scores a few hits on Hood. But, the concentrated fire of the two British battleships pounds Prinz Eugen to pieces. The German ship explodes and sinks:
Bismarck is now out of range and with Hood severely damaged the British break off the action. Prince of Wales shadows Bismarck, while Hood turns for home.  The action ends as Bismarck slips away:


What fun. fast moving and easy to play. I initially thought Hood would sink and the outcome would reflect real events, but it was not to be.


Thursday 27 December 2018

Ros Figures - Prussian Gunners

Some may know from my other blog that I collect and paint Ros 25mm figures, which were made in the mid-seventies for a short period. Over the years I have hunted down most of the Napoleonic range, although there are still a few gaps in my collection.

A fairly recent find was a group of Prussian artillerymen. Along with a number of other originals I asked Old John to recast them.  Just before Christmas a batch arrived, which included the Prussian artillery.

This is what they look like when painted:


Sunday 23 December 2018

Battle Report - Mons, August 1914

Yesterday, with the visit of my brother, Phil, we managed to fight the action at Mons using slightly adapted Command and Colors rules. The table was set up as shown here:
With the Germans deployed at the top of the table. The battle kicked off with a German artillery barrage that caused some British casualties and forced one of their artillery batteries to withdraw with heavy casualties.  The German infantry began their advance on their right towards Jemappe:
However, British machine gun, artillery and rifle fire broke up the attack causing considerable casualties for the Germans, and the British gain their first Victory Point (VP).

Having ground to a halt on the right the Germans make a push in the centre towards Nimy:
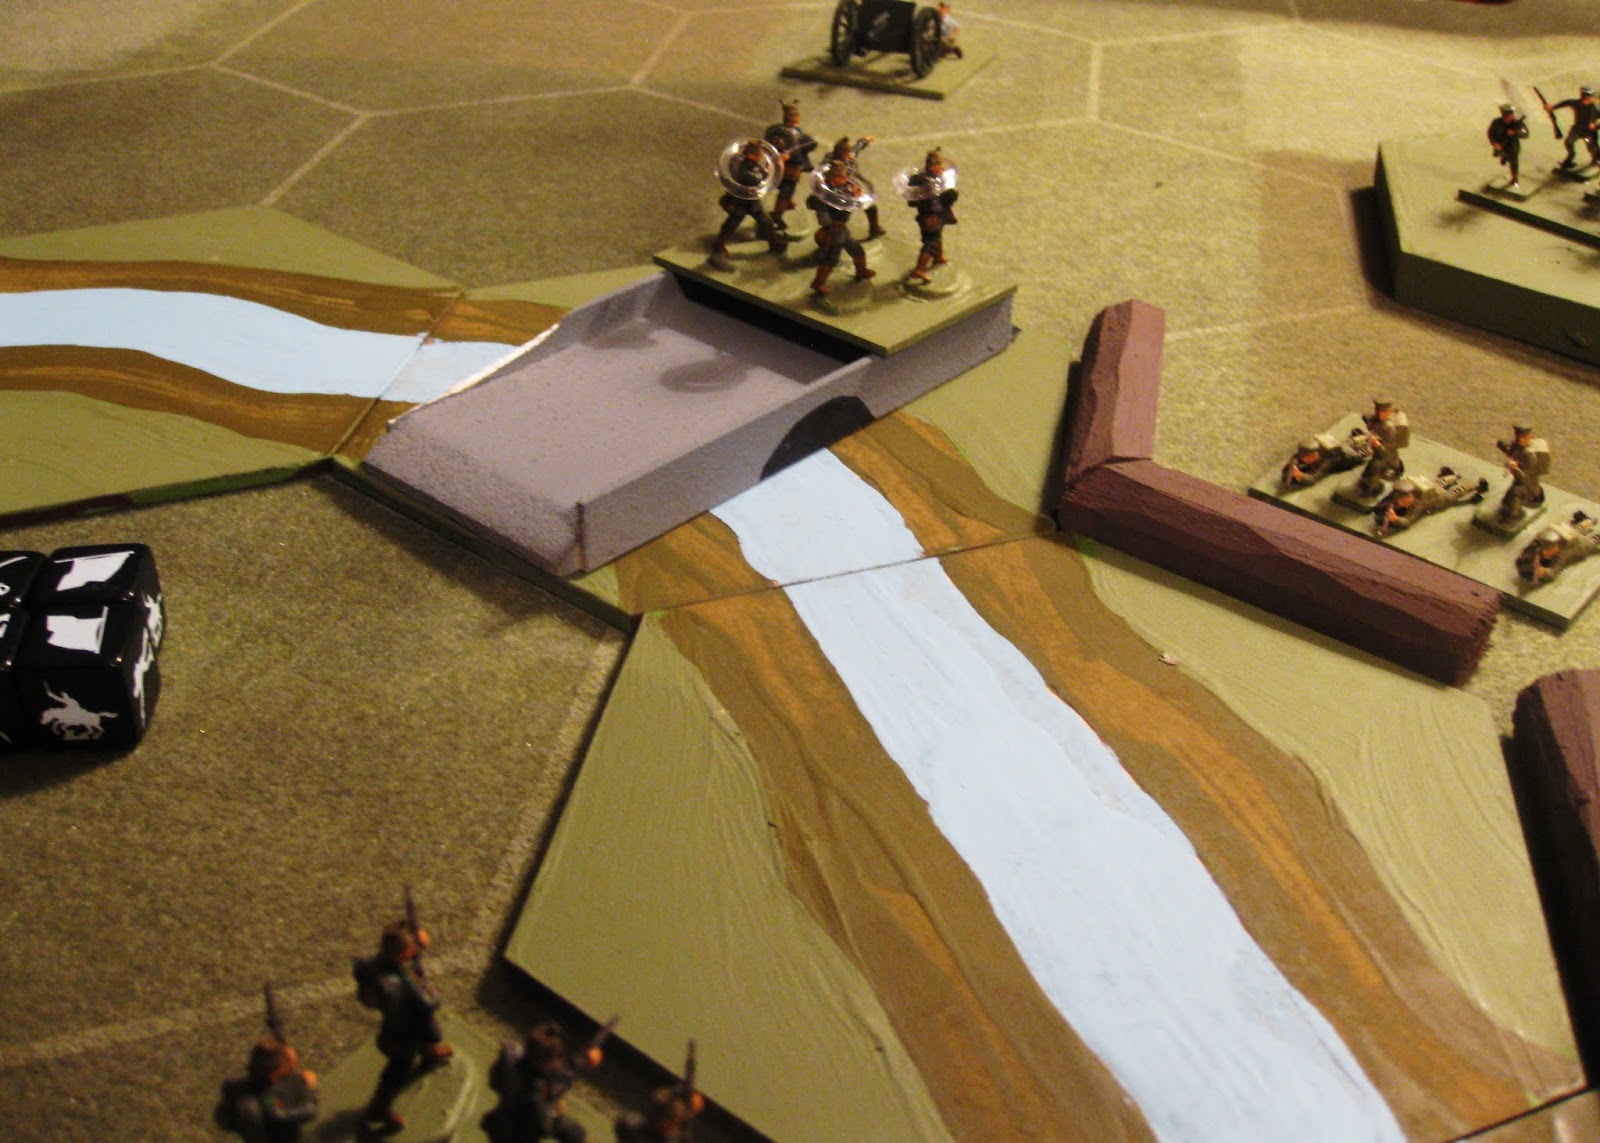
Despite heavy casualties the Germans close in on the two crossings at Nimy.

Getting across the bridges proved to be a challenge, but the Germans are able to prevent British engineers from blowing these key crossings. The battle around Nimy ebbs and flows for several moves, with the British holding off the Germans, but losing many casualties in the process.

Meanwhile on the Germans left an advance by Jaegers secures the village of Oburg, as a springboard to assault the left flank (British Right).

Several waves of Germans are beaten off, but eventually, as the British are depleted and pushed back the Germans take the left hand crossing:
The fighting around this area is fierce and the German edge forward seriously threatening the British right flank:
With the smell of success in the air the Germans, now heavily depleted gain a toehold on the far bank; but, their hopes are dashed as Phil activates his reserve and fresh units from 7 Brigade push forward and eject the Germans, but not without heavy losses.

At this point the British engineers manage to blow the Oburg crossing, denying this route to the Germans:
With the German assault on the left thwarted the action shifts back towards the centre and a quick German advance sees German troops capture the two Nimy crossings and jackboots are heard on the streets of Nimy:
The fighting in and around Nimy is fierce. In the nick of time some reinforcements from British 7 brigade plug the gap and a counter attack over the Nimy rail bridge chases the Germans back;
At this point, the Germans in Nimy are deemed to have run out of ammunition and are forced to withdraw back across the road crossing. As the next German assault begins to form and in the face of heavy casualties the British now are forced to withdraw:
But, the short pause allows the British a clean break and gives them the opportunity to attempt to blow the bridges, one charge goes off, but the other fails.

There is now no stopping the German advance.  The British have reached their exhaustion point and although able to withdraw the battle is deemed a narrow German victory at 8 - 7 to the Germans.

This was a really interesting battle and it mirrored very much the feel of the real action that took place at Mons in 1914.

Next stop Le Cateau!


Warrior Miniatures Russian Dragoons

Another unit has been finished off and I am pleased as to how they have turned out.  I now have two infantry and two cavalry units, perhaps it is time to paint some artillery?


Merry Christmas all!

Saturday 22 December 2018

Warrior Miniatures - Russian Jaegers

Over the last few days I have been finishing off a couple of napoleonic projects. First up are these Russian Jaegers by Warrior Miniatures:

Next up will be some Russian dragoons.

Sunday 9 December 2018

Battle of Mons - Setting it up

I plan to play out the Mons battle using my newly painted WW1 figures. I have decided to depict the action that involved the British 3rd Division on 23rd August 1914, when they defended the Nimy salient.  This wide arch in the Mons - Conde Canal had the small town of Nimy at its centre. Just to the south lies the town of Mons. The canal is too wide and deep for fording and can only be crossed at the five remaining crossing points, that are either bridges or locks. The famous Nimy railway bridge lies in the centre of the action (where the first VCs of WW1 were won).

Defending the salient are the three brigades of the 3rd British Division; 7th. 8th. and 9th Brigades. Facing them coming down from the north are elements of Von Kluck's German First Army, in the shape of three Divisions from 3rd Corps; the 6th, 18th and 17th Divisions.

The wargames table below shows the starting dispositions:

I am going to use Command and Colors rules, slightly modified for the action.  The British will gain from their high rate of fire (15 rounds a minute) and the fact that at this early point in the war the Germans used massed infantry blocks in the attack.  Also the British benefit from being in prepared defensive positions, although not deep trenches.

This should be quite a punch up.

Friday 7 December 2018

WW1 German Army - Airfix and others

Having painted three Airfix German Regiments I have given up due to the amount of flash on the figures. The most difficult areas being around the spiked helmet. I needed four more regiments and so I have resorted to Hat figugures and a few Emhar.  For artillery I have used Hat guns and a mix of Airfix abd Hat crews.  I now have a completed army ready for my Mons battle:

The whole army:
Artillery:
High Command:
More casualty markers:
Hat infantry:
Hat Jaegers:
Heavy Artillery:
Advance!


Tuesday 4 December 2018

Airfix WW1 German Infantry

After a fair bit of heart ache I have finally produced my first Airfix regiment from the boxes bought recently. I think this will be my last though as the remaining figures will be a real challenge. If I need more, I will buy second hand figures off ebay where I can see how much flash they have.

Anyway, I have a unit of Airfix Germans ready for action along with some casualty markers:

I have painted up two Hat regiments and I am currently working on two Hat Jaeger regiments, these will join the two old Airfix regiments that I already have in my collection.