Douglas Miniatures Logo

Douglas Miniatures Logo

Sunday 17 December 2017

Armoured Action - Units and Scale

Having cobbled together  a set of tables for movement, visibility and firing for tanks based upon hexes, I need to think about unit size and the area they occupy. Starting off with Grant's book 'Battle' and also looking at other rules by early wargamers, including Wise, Featherstone, Lyall & Son, Quarrie and Asquith, there seems to be a consensus that one tank model represents a platoon/troop and a group of three models represents a squadron. If I were to go along with this, it would make sense for one tank to represent a 'unit' and a unit fits into one hex. Thus a Company/Squadron can be made up of 3-5 tanks, occupying the same number of adjacent hexes.  I have decidd to have three tanks per Company and set out would look like this:
Using the same model my Battalion/Regiment, would be nine tanks and would look something like this:
This is likely to be close to the limit of tanks on my table, possibly I could add one more company; but I think it looks about right. Any more tanks per hex would be too crowded. For the time being this is what I will go with.

Whilst looking at this issue, I decided to give some thought to infantry structures.  Looking at the same sources they all have settled for an organisation of 10 - 12 figures representing either a platoon or a company.Most have a leader, 4-5 riflemen, a couple of submachine (SMG) gunners, a light machine gun (LMG) team and an antitank (Atk) team; although Grant does not have any heavier machine guns at this level in his rules. I have settled on a leader with SMG, a two man LMG, a second SMG, four riflemen and two Atk men; giving a unit of 10, which I will call a platoon.  I tried this on my table, but sqeezing so many figures in to one hex did not look right at all.

So, I have decided that an infantry unit can occupy two adjacent hexes, looking like this:
Three of these units/platoons will make up a company, with an additional command team:
Three companies put together will create a battlion. In addtion to the above, a battalion will have a support comapny, with a heavy machine gun platoon, a mortar platoon and heavy anti-tank platoon, as well as a command group. Eachsupport  platoon occupies one hex; although I will probably allow these platoons to split when on the table. In such a case they would have to be adjacent to at least one unit. In this example I have used Russians, as illustrated here:
My initial thoughts.

Next I hope to play test the armour rules; although I am also thinking about how to convert Grant's infantry rules so that they work on a hex table.


Thursday 30 November 2017

Armoured Action Take 3

Having taken on board the comments regarding weapon performance, within the limitations of the rather simplified mechanisms in the Grant system, I have adjusted the table to hopefully give a better reflection of the capability of tanks.  Here is the latest chart:

Next up is to give these rules a go!

Monday 20 November 2017

Armoured Action Rules - Take 2

Having taken on board the suggestions received, I have had another go at producing a set of rules for tank battles within a single table, based upon Charles Grant's simple rules from his book "Battle". I think these may well work. This is what they look like now:
I am going to add some additional vehicles, but I think I am now ready to play test these.

Saturday 18 November 2017

Armoured Action - Simple WW2 tank rules

As mentioned before I have always been a great fan of Charles Grant's rules for WW2 contained in his book "Battle! Practical Wargaming".  On leafing through the book again, I was struck by the simplicity of his rules for tank warfare, which he explains in the chapter under Armoured Action.  Essentially everything you need to fight a battle is contained in two simple charts, although Grant does employ a rather complicated measuring stick for calculating the strike angle of a shot. Here are the charts extracted from the book:

I am keen to try these rules out, but wondered if they could be modified to work on a hex grid, expanded to include more vehicles and simplified further. After some playing around, I came up with this:
I based the additional data on the calculations used by Grant in the book to be played on a five inch grid. I would see one vehicle being allowed in a hex. I have added factors for side and rear shots, removing the need for the strke angle tool. Now the ranges and moves have been calculated, any scale model and hex size can be used - I think!  Thus, 1/300 scale tanks on a one inch grid could be used.

I plan to give these rules a test run in the coming days - just as soon as I dust off my old Roco Minitanks.


Sunday 5 November 2017

Battle Report - Kreuzdorf Bridge - Finale

With the Bridge now ready to blow, the priority for the British commander is to recover A and B Companies to the home bank and destroy the bridge before the enemy tanks break through.

At last luck changes for the British, with a high troop activation dice throw, two of the Chieftains depoly on to the high ground, following more good luck as the Artillery Forward Observer requests a fire mission to take out the annoying Swatter ATGW launcher. His request for fire is granted by being allocated a regiment of 155mm guns. Five rounds fire for effect sees 90 shells slam into the hill, obliterating the BRDM Swatter launcher:

The rest of the British movement sees A and B Companies begin their withdrawal.

On the other hand, the Soviets have a very poor activation; limited to just one pot shot at a Chieftain, that misses.

This pause allows the British infantry to break clean and pull back, and the Chieftains to take up their new fire positions on the higher ground:
The Soviets now have better luck, and realising that the bridge will be blown soon, their commander decides to push his armour forward en masse. Three companies  of tanks supported by two infantry companies surge forward:
The soviet tanks now come into range of the Chieftain 120mm guns and two T-55s are soon on fire:
Meanwhile most of B Company and the A Company APC make it to the bridge and cross over:
The soviet tanks rumble forwards and A Company comes under serious pressure and is unable to move, taking fire from infantry and tanks:
On the other flank Soviet tanks push through the abandoned B Company forward positions:
But are halted by accurate fire from the Chieftains:
Another T-55 is hit as it attempts to break through A Company:
The remnants of A Company capitulate as they are overun by tanks. In the centre, two tanks of the Soviet centre company rush for the bridge, as those men of B Company who managed to escape cross over to the home bank:
The British Commander decides that A Company is lost, the survivors of B Company on the far bank will have to swim for it as he gives the order to the engineers to blow the Bridge:
The Bridge collapses into the river and the enemy advance is halted. The Chieftains kill two more T-55s before pulling back from their firing positions.

The battle is a win for the British, although they lose over a third of their infantry and tanks.  However; the Soviet advance has been halted for the time being.

The last headlong assault was very costly for the soviet commander. He has lost over half of his tanks and failed to take his main objective, the bridge.


:


Sunday 29 October 2017

Battle Report Part 2 - Kreuzdorf Bridge

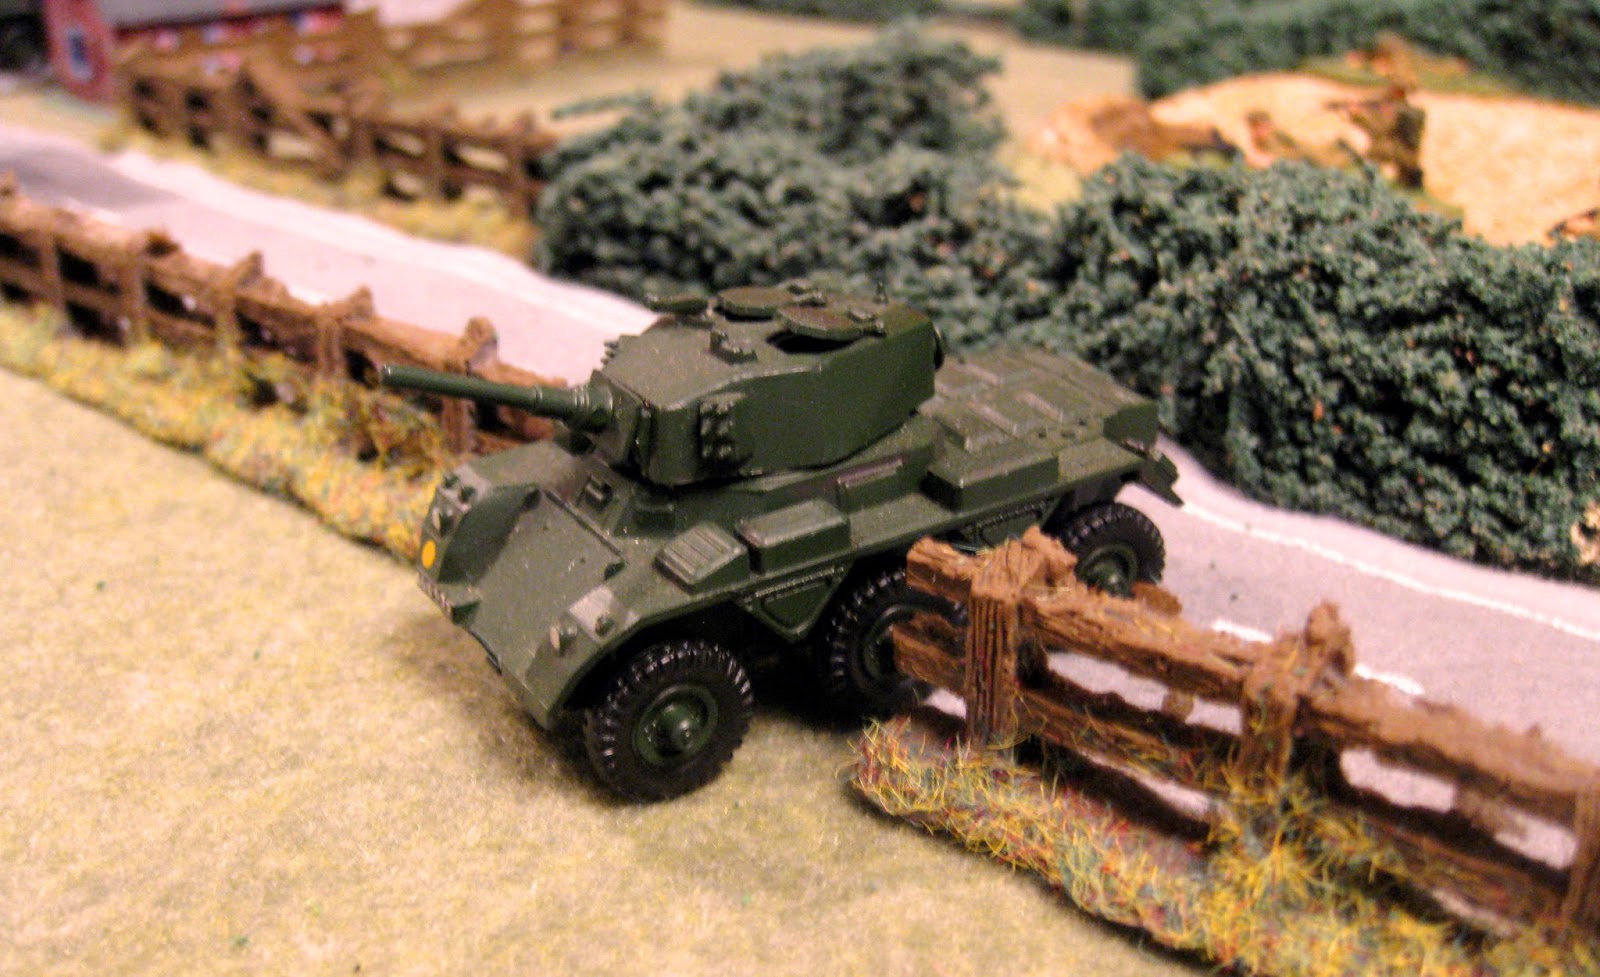
Following the destruction of the Yeomanry Saladins, D Company and the remaining Saladin pull out of Kreuzdorf and despite a few shots from the advancing Soviet tanks they make it to the Bridge and cross in safety:
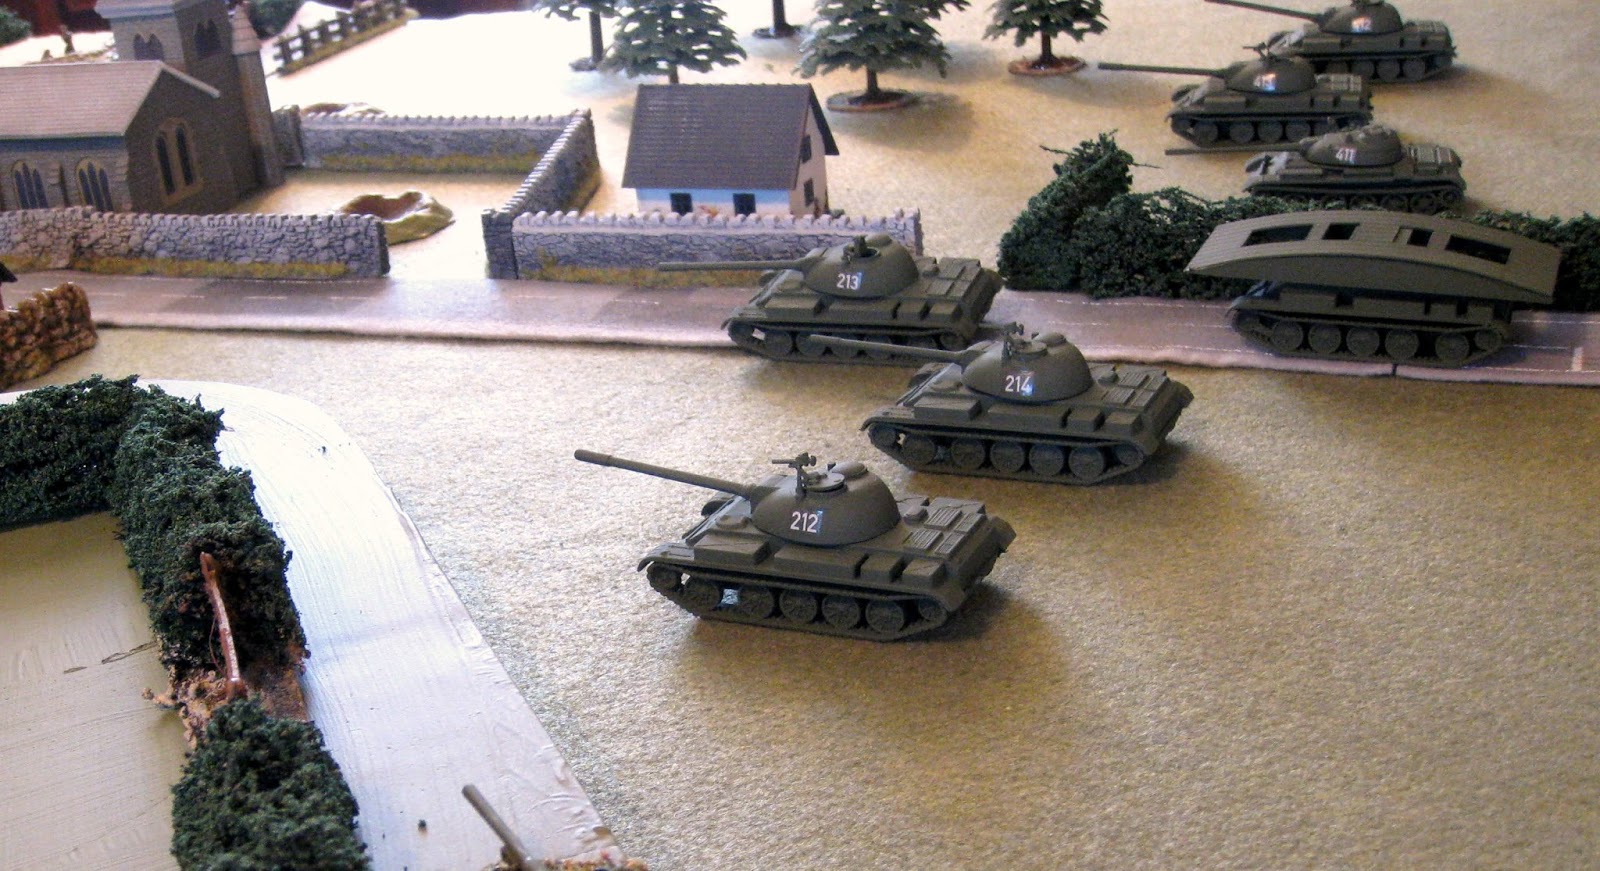
The Soviet tanks edge forward around the wood besides the church:
However, the Soviet commander decides that it is too risky to venture further into the village and close country without infantry support, so he orders up his infantry battalion, with two companies on the right:
Who dismount and move into the wood:
And a third Company on his left, tasked to clear the hedgerows:
The soviets also order an artillery strike onto the bridge to disrupt the British engineering activity. This strike hits its target and eliminates half of the engineers; the rest run for cover. Some of the demolition charges are damaged by the fire:
For the British the situation is becoming serious, a large attack is developing in front of A Company and Soviet forces are pushing forward. The British Command is desperate for artillery support, but is turned down due higher priority targets eleswhere; besides he now finds that his observer team is too exposed and it too has to withdraw over the bridge under a hail of fire from the Soviet tanks in the village.

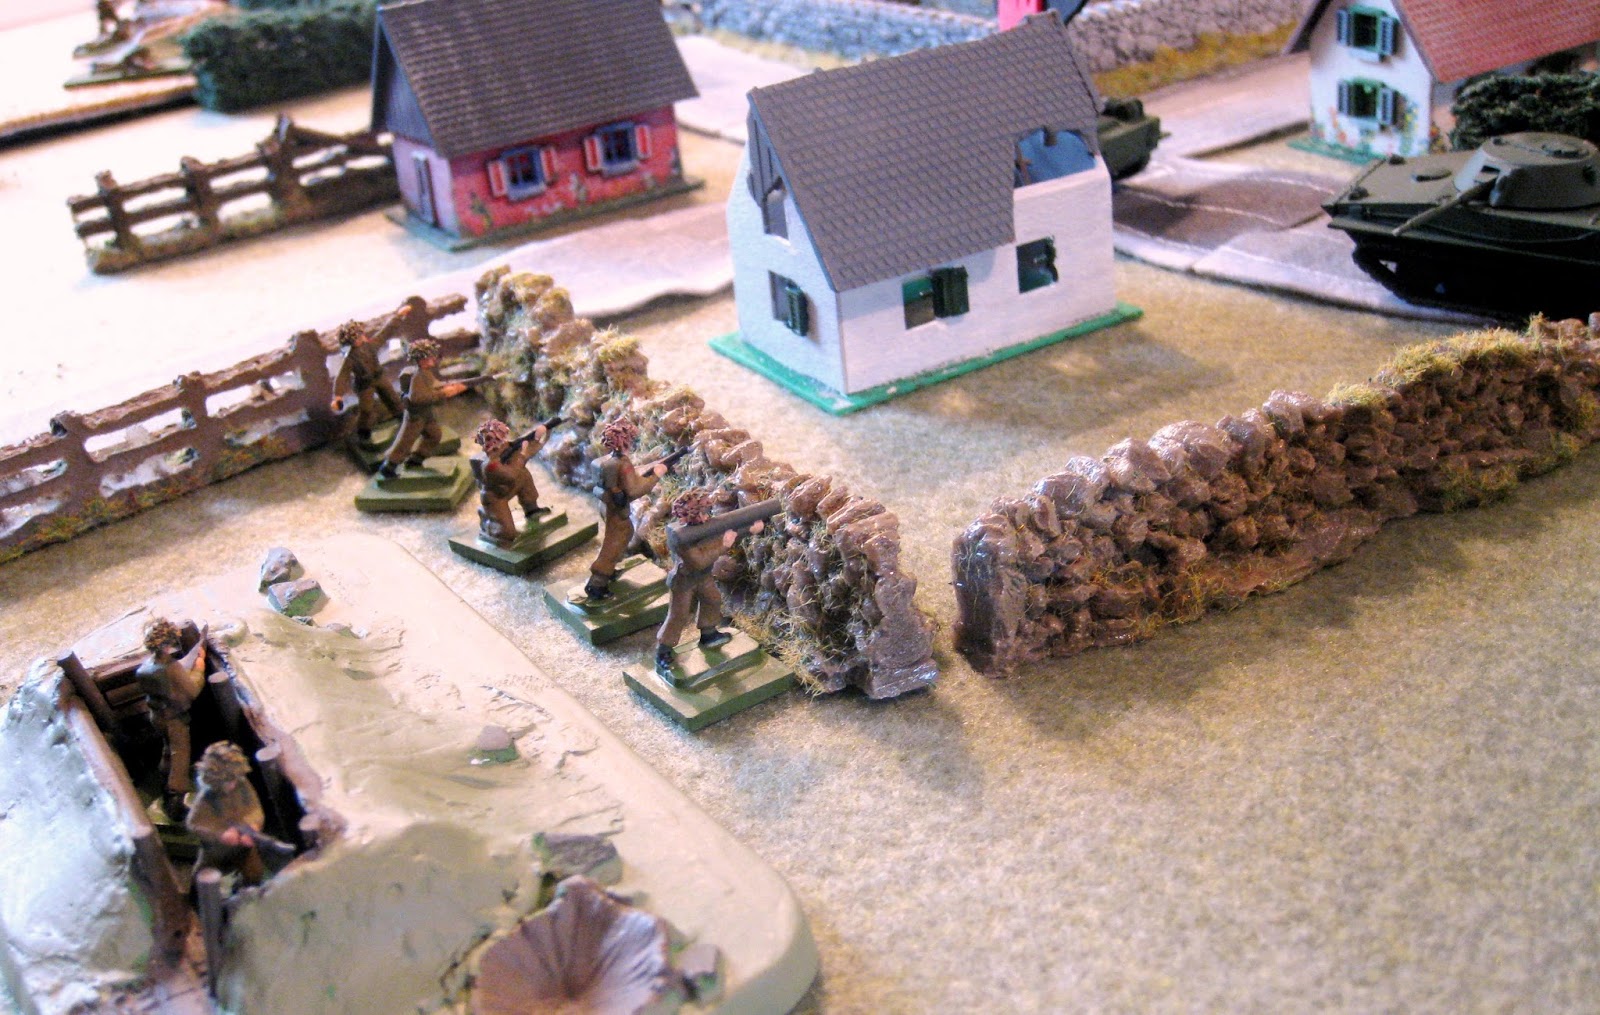
A brisk fire fight develops between the advancing soviet infantry and A company, who hold their ground, supported by mortar fire and a Chieftain on the hill behind the river, which destroys a BTR-60 that strays too far forward:

One British soldier is eliminated, but the soviets lose one APC and three men to the mortar and tank fire.

The Soviet commander orders his recce tanks to probe forward into the village, but they come under fire from a B Company 84mm, which misses:
But a Chieftain on the high ground does not miss and the leading PT-76 goes up in flames:
The Soviet commander decides that he must deal with the British tanks on the high ground by deploying additional anti-tank assests. First a man-portable anti-tank missile is fired from the high ground:
This misses its target and comes under fire from a second Chieftain also on the hills beyond the river. The soviets bring forward a BRDM-1 Swatter, which has a very lucky hit on its first shot, destroying one of the Chieftains:

This is a serious problem for the British as the Swatter launcher is beyond the range of the British tank guns and can fire with impunity. The British artillery observer is now in position and he requests a fire mision against the Swatter; but he is turned down once again:
The Soviet commander does not have such a problem as he has his own artillery under command, which continues to harry the engineers working on the bridge. He also has air support, which he now calls down upon the second Chieftain which has exposed itself:
Two ground attack fighters roar in and a second Chieftain tank is on fire:
On the soviet left their infantry have worked through the fields and come under fire from the B Company APC, killing a couple of men; however, an RPG round soon takes it out:

The situation is looking very grim for the defending British; however, the engineer commander radios in that the demolition is prepared and the bridge is ready to blow.

The final installment will cover how A and B companies extract and whether the bridge can be demolished in time to prevent the soviets crossing the river.


Friday 27 October 2017

Battle Report Part 1 - Struggle for Kreuzdorf Village

The British plan is to delay any enemy advance by defending Kreuzdorf village until it becomes untenable and then withdraw D Company and the Yeomanry Saladins back behind A and B Companies, that form the main defensive position.

All goes well to begin with. As the Soviet recce vehicles approach the village they come under heavy fire from the British armoured cars. A lucky hit knocks out a PT-76 light tank and as a BRDM-1 scout car runs for cover, it too is taken out. The Soviet probe around the church is destroyed.

The Saladins have less luck on the eastern route, failing to damage any enemy vehicles.

The Soviets are alerted as the recce troops radio back the presence of the British in Kreuzdorf. The Soviet commander moves up and takes a position of observation on the hill outside the village. He also brings up a 120mm mortae team and SPG-9 recoiless anti-tank guns:

The exchange of fire between the Saladins and the PT-76s continues, with the Yemanry losing one vehicle:
On the next turn the British Artillery observer requests a fire mission, but is turned down as all guns are busy. The Soviet commander however, uses his 120mm Mortars to good effect on the village. This stonk takes out the HQ of D Company and a couple of riflemen. The PT-76s destroy another Saladin:
The British are losing the battle for the village, and the order is given to D Company and the Yemanry to pull back. The British Commander wonders whether he should have deployed some of his Cheiftains forward. As he ponders the sound of battle tanks can be heard beyond the village as a company of Soviet tanks appears:
The Saladins pull back, but one is taken out by a Soviet tank:
Only one Saladin remains and it scoots back towards A Company:
At last the British artillery observer is allocated some guns and he brings down fire that smashes into the Soviet HQ, killing the commander and a rifleman:
However, more Soviet tanks rumble onto the field:

The remnants of D Company fight their way out of the village:

Not such a good morning for the British, although they have blunted the enemy recce and disrupted the Soviet command and control - for the time being.

Next.....................the Soviets close in on the bridge.