1943, and Sage Island is is a small, jungle covered isle in the Pacific that has been occupied by the Japanese army. It is relatively small, but large enough to accommodate an airfield and a small anchorage. The 21st US Marines have been tasked with securing a beachhead, to permit a drive inland to capture the airfield.
The immediate objective is to capture a line of low hills that dominate the beach and the Marines have been ordered to secure three that guard two exits from the landing area. Here is a view of the area of operations:
The three hills have dug in positions and there are two bunkers, each containing 47mm anti-tank guns. In addition there are a couple of machine gun nests, mortars and some artillery to the rear of the hills. The Japanese also have an infantry company in reserve. The hills themselves are heavily wooded with palms trees and are no-go to vehicles.
It is early morning and the Japanese infantry wake to see a line of US amphibious vehicles coming from the sea. At the same time a supporting US cruiser bombards the Japanese positions, but despite a lot of noise does very little damage:
The first wave of US marines arrives in LVTs which engage the shore with their 37mm guns and cannon.
The Japanese response is swift and two LVTs are quickly taken out by the anti-tank bunkers.
The second wave of US Marines, in a fleet of DUKW move onto the beach behind the cover of the LVTs. The number of US troops on the beach begins to increase.
However, casualties from machine gun and rifle fire inflict heavy casualties amongst the marines on the open beach and the Japanese anti-tank guns destroy more LVTs.
After a stiff fire fight a platoon of Marines is able to flank the right hand anti-tank bunker.
And, despite heavy casualties eventually they are able to take out the Japanese gun.
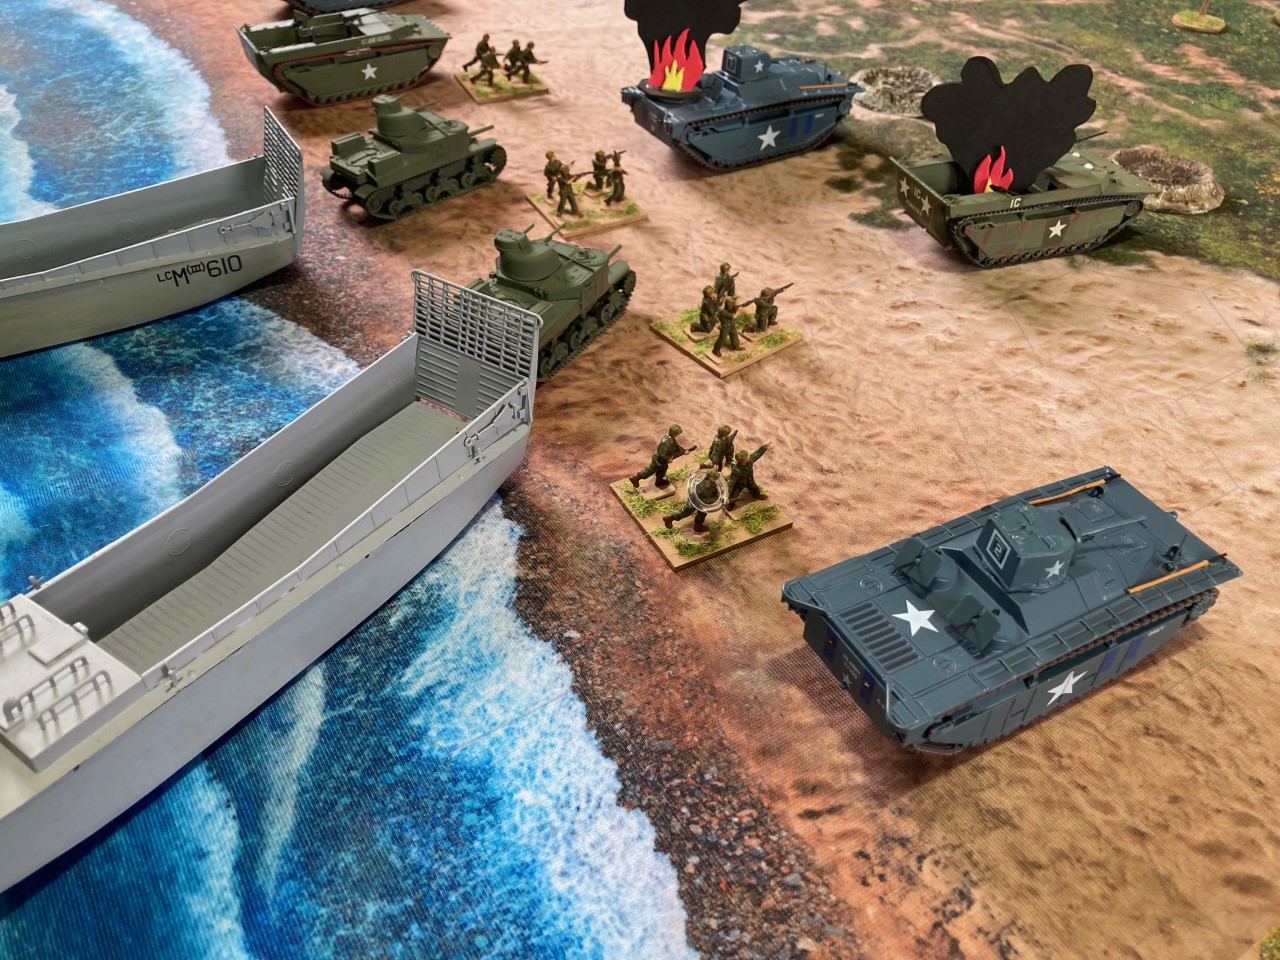
Here is the situation on the cluttered beach. In the background the first of the heavy landing craft (LCTs) edges towards the shore. A fourth LVT has now been destroyed.
The first two M3 tanks are disgorged onto the sand
Having taken out the bunker the marines are able to work their way onto the hill and begin to engage the trenches. It is a costly move and the battle for the hilltop swings back and forth.
So far the marines are unable to dislodge the Japanese who continue to fight despite mounting casualties.
Then the Japanese artillery zeros in on the beach and causes yet more casualties amongst the exposed US infantry.
The marines finally manage to clear the right hand hill, but they have insufficient strength to hold it as the Japanese commander commits his reserve company.
Some good news for the Americans as one of the M3s finally eliminates the second anti-tank bunker.
On the beach Japanese shells continue to fall amongst the exposed marines.
More troops flood ashore, bringing in the marines' heavy weapons.
But, both the centre and right hills have been reinforced and the trenches are reoccupied by Japanese infantry.
This is the situation as the landing is all but completed. The US now have four tanks on the beach and the Japanese have little to counter them as the 75mm tank guns begin to blast the hill tops.
However, the Japanese artillery is still fully in action pouring shells onto the beach.
After more desperate fighting the marines once again clear the right hand hill.
Shortly after, with fire from the tanks in support the marines work their way onto the central hill.
It looks like the Japanese are all but defeated, but not before one of the field guns brings direct fire onto the flank of an M3, destroying it.
At last, having suffered severe casualties and losing a fair bit of their armour, the objectives are taken by the marines. The first action to secure Sage Island is complete and is a costly American victory.
Most of the figures used are from my Airfix collection, with a mix of Airfix and diecast armour. For rules I used an adaptation of Memoir'44 rules. Overall, an enjoyable game, which swung back and forth but the weight of US equipment eventually overwhelmed the defenders.


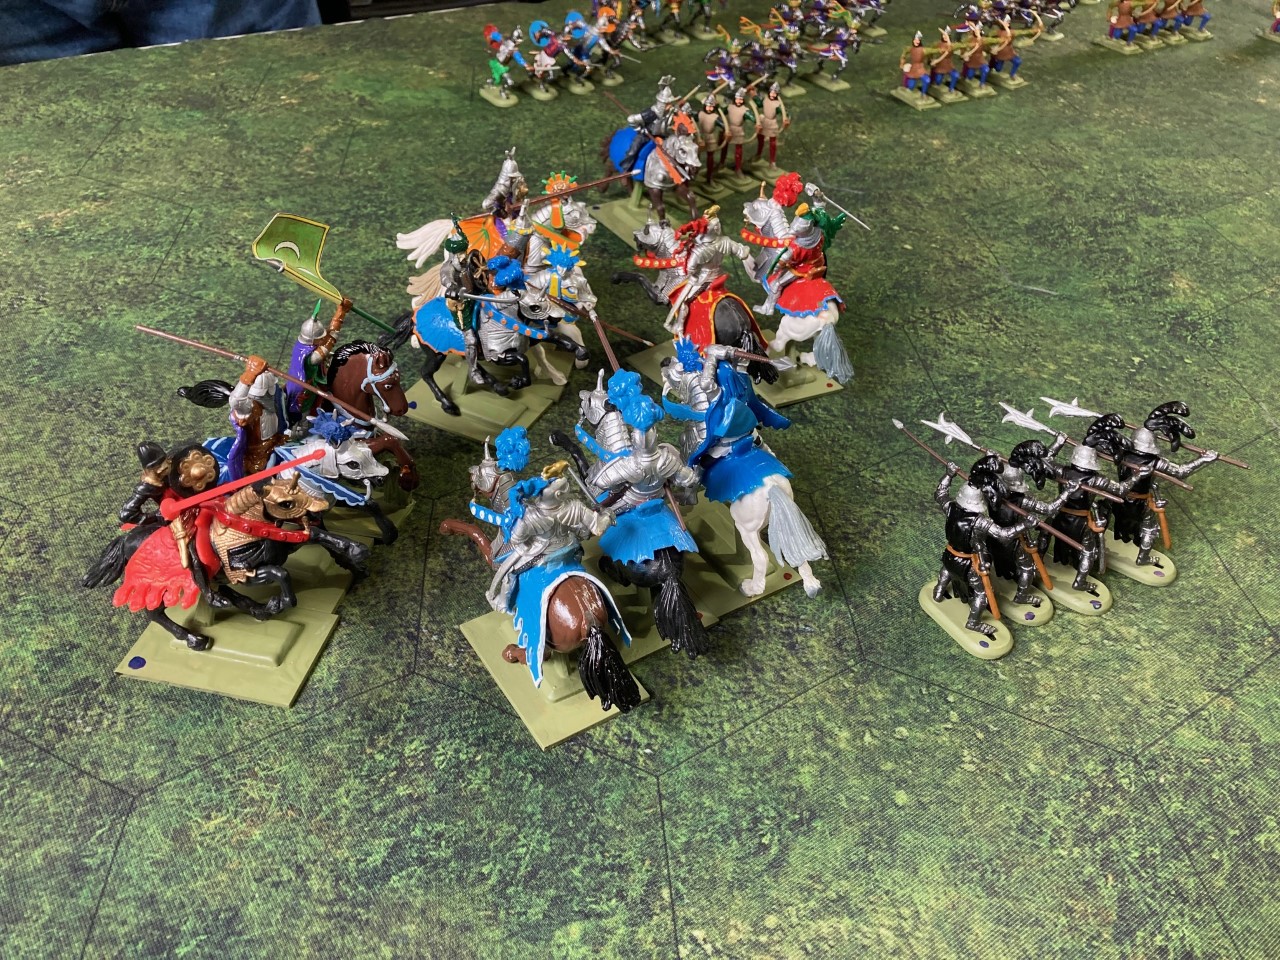
 Immediately, three units of Eastern medium cavalry moved forward to counter the knights. The Eastern cavalry came out on top, destroying one unit of knights and damaging another. They also rolled up one of the Western archer units (we forgot to 'evade'.).
 Attention then shifted to the other flank as more Western knights galloped forward supported by medium men-at-arms. Once again, although causing damage the Western army came off worse for wear.
 The battle flowed back and forth with losses and gains being made by both sides.
 The Western army became very broken up and their slow heavy infantry in the centre was unable to make much progress, relying on the medium infantry to take the battle to the enemy.
 The battle then reduced to a series of smaller skirmishes across the field with the Eastern army gaining the upper hand.
 By now the Western army was totally fragmented and reached its exhaustion point. The Western army capitulated, but with the knowledge that some serious damage had been done to the Easterners.
 I am not sure we did everything correctly and in accordance with the rules. We did not use leaders, which would have added a new dimension and I am not sure we always got the retreat aspects correct. Having said that, it was a fun fast moving game that we would like to try again.