Douglas Miniatures Logo

Monday, 28 May 2018
Saturday, 26 May 2018
More Austrians
I have added another two Ros/Warrior battalions to my force, as well as a unit of Minifigs S Range Jaegers:


Apology to those who comment
I do hope that readers who take the time to comment do not feel that I am being rude bynot responding. For some reason I am no longer receiving email notifications when comments are posted. This means i stumble upon them by chance when I am looking at my blog. I am trying to work out how to switch notifications back on!
Friday, 25 May 2018
Makings of an Austrian Army
As part of my interest in Ros 25mm Napoleonics I have amassed a large number of Ros Austrian line infantry. I have around 60 of them. Ros never produced any Austrian command, artillery or cavalry, so for some time I have been pondering what to do with them. I did consider using Minifigs S Range alternatives, but collecting enough would be difficult and expensive. My dabblings with Warrior Miniatures gave me some inspiration, so I ordered a number of sets of command figures. Here is the result; Ros Austrian line with Warrior command.:
 I think they work quite well together and I am in the process of creating a small Austrian Army, with six similar battalions, some Minifigs Jagers and Warrior cavalry.

Thursday, 24 May 2018
Airfix & Battle Cry - Cedar Mountain
I thought it was time to dig out my old Airfix ACW troops and have a go at one of the Battle Cry scenarios; I picked the battle of Cedar Mountain:
 The scenario has the Federal forces groping forwards against what they believe to be a smaller CSA force; however, coming through the forest is a significant reinforcement led by A.P. Hill. This is the battle as set out on the table:
 Things started off well for the Federal forces, successfully attacking in the centre and their right flank, sweeping away a CSA battery and infantry:


 A brisk firefight slows down the Federal assault in the centre:

And on the CSA left the Federal troops are halted:

 The Federal troops rally and after a second assault the CSA centre collapses, with the destruction of a battery and an infantry unit. The rebel centre is wide open:
 Only the Texans remain in the centre, grimly holding on to a small settlement:
 The tide then turns in favour of the rebels as Hill's troops come up to fill the void in the centre:
 The Texans join in the advance and things look good for the CSA:
 Hill's troops advance against the Federals holding the high ground, but two batteries of blue coated gunners destroy the advancing rebels:
 At the same time Federal infantry firing into thr flank see off the Texans. Suddenly the tide has turned and it is now 5 - 4 to the Federal side; needing 6 points to win.
The Federal win comes with a dashing cavalry charge, supported by infantry over on the right Federal right flank:
 The end comes quickly, with the CSA taking too many casualties and it is a 6 - 4 win to the Yankees!
The final positions:
 This was a really enjoyable game. I thought the CSA would easily win by sheer weight of numbers, but the bold Federal attacks (and some lucky cards and dice!) saw them quickly gain victory. The battle took about an hour to play.


And on the CSA left the Federal troops are halted:


The Federal win comes with a dashing cavalry charge, supported by infantry over on the right Federal right flank:

The final positions:

Thursday, 17 May 2018
Arnhem Battle Report - Memoir '44
Domestic matters and travels have delayed my reporting of this battle; however. today I managed to finish it off, and what an epic struggle it turned out to be!
With 10 tanks, lots of artillery and infantry, I fully expected the Germans to romp through the paratroopers positions. On this basis most of the German early moves and activation points were used up moving and fighting with tanks. However; after a few moves it was clear that tanks were not at all effective in close combat in built up areas and they paid a heavy price.
First blood went to the paratroopers when a Panzer IV attempted to rush the bridge:
 And an attempt to rush the drop zone was beaten off by the defending British:
 Armour attacking in the centre towards Oosterbeek also came to grief:

 A German combined artillery, tank and infantry assault on Arnhem town had more success and part of the town near the bridge fell to the Germans:

 However, counter attacks by the paratroopers cleared the German infantry out of the town and accounted for another German tank:
 The paratroopers were back in control of the north side of the bridge:
Meanwhile over in the area of Oosterbeek German artillery and infantry attacks allowed the Germans to gain a foothold, cutting off the paratroopers link to the bridge:
 In the next turn the British abandoned the drop zone and moved reinforcements towards Oosterbeek; a brisk firefight removed some SS troops out of the woods:
 On their next turn, having suffered more casualties from the German artillery fire, the paratroopers counter attacked the Germans that had captured part of Oosterbeek, quickly regaining the east of the village.
The Germans then made an all out effort to take Arnhem and capture the bridge. A combined attack from the North and South sides saw the Germans at last in possession of the key terrain, the bridge itself:
 During the next couple of moves the battle raged in the town of Arnhem around the bridge. The German attack was destroyed and the paratroopers reoccupied the Bridge.
At this point, with three tanks destroyed along with five infantry units the German exhaustion point had been reached. Suddenly on the cusp of being defeated the British managed to steal an 8 - 5 victory. The final positions had the British just in control of the Bridge, strongly holding Oosterbeek and the drop zone was no mans land:

With 10 tanks, lots of artillery and infantry, I fully expected the Germans to romp through the paratroopers positions. On this basis most of the German early moves and activation points were used up moving and fighting with tanks. However; after a few moves it was clear that tanks were not at all effective in close combat in built up areas and they paid a heavy price.
First blood went to the paratroopers when a Panzer IV attempted to rush the bridge:


Meanwhile over in the area of Oosterbeek German artillery and infantry attacks allowed the Germans to gain a foothold, cutting off the paratroopers link to the bridge:


The Germans then made an all out effort to take Arnhem and capture the bridge. A combined attack from the North and South sides saw the Germans at last in possession of the key terrain, the bridge itself:

At this point, with three tanks destroyed along with five infantry units the German exhaustion point had been reached. Suddenly on the cusp of being defeated the British managed to steal an 8 - 5 victory. The final positions had the British just in control of the Bridge, strongly holding Oosterbeek and the drop zone was no mans land:

Monday, 7 May 2018
Battle for Arnhem - Memoir '44
Continuing my emphasis on gaming rather than painting, has led me to delve deeper into those old storage boxes for figures. I have always wanted to play a game involving paratroops, and Memoir '44 provides the opportunity to refight some of the bigger actions on a small table.
I decided to use an adaptation of an unofficial Memoir '44 game that I found on line, set up on a 6 x 4 table using 1/72 scale figures and vehicles. Looking at the scenario it would appear to represent the situation around 19 September 1944 (two days into the operation), with the town of Arnhem, the village of Oosterbeek and the drop zone being held by the paras in distinct salients. The Germans, made up from elements of 9 and 10 SS Divisions plus others are advancing on the surrounded British. Here is the initial set up overview:
 The area of the bridge:
 The area of Oosterbeek:
 The drop zones:
 And the German main position:
 The germans have a lot of tanks, a mix of Tigers and Panzer IVs, supported by artillery, while the paratroopers have a few anti tanks guns and some light artillery and mortars.
The tanks are mostly Airfix types and the troops are a mix of old Hinchliffe 20mm, some MLR and various plastic figures.
A battle report will follow.
I decided to use an adaptation of an unofficial Memoir '44 game that I found on line, set up on a 6 x 4 table using 1/72 scale figures and vehicles. Looking at the scenario it would appear to represent the situation around 19 September 1944 (two days into the operation), with the town of Arnhem, the village of Oosterbeek and the drop zone being held by the paras in distinct salients. The Germans, made up from elements of 9 and 10 SS Divisions plus others are advancing on the surrounded British. Here is the initial set up overview:


The tanks are mostly Airfix types and the troops are a mix of old Hinchliffe 20mm, some MLR and various plastic figures.
A battle report will follow.
Saturday, 5 May 2018
Battle Report - Ligny 16 June 1815 - Command and Colors
This battle turned out to be an epic struggle for control of Ligny brook and the villages along its banks.
 The action became divided into three distinct battles; being fought on the left, in the centre and on the right. Each action saw fortune swing one way then the other, each time casualties mounting.
The French kicked off the battle with an attack in all three areas, but the cards dictated that initial emphasis should focus on the left flank, with a French attempt to take the village of La Haye:


 The Landwehr units holding the village were quickly overwhelmed and La Haye was soon taken by the Young Guard:
 French Chasseurs a Cheval charged forward and destroyed a Prussian battery:
 Meanwhile Prussian counter attacks are beaten off by the Young Guard, who are now attempting to break out of the village:
 However, a counter attack by Prussian cavalry and more infantry sees the Young guard being overwhelmed and the French desperately cling on to La Haye:

 Eventually the French are forced out, but they take a heavy toll of Prussians as they depart.

In the centre there is a similar story with the battle for St Amand and the wood to the east. Initially the village is held by Prussian line infantry and jaegers:
 The French take a battering as they approach the defending Prussians
 An assault by the French finally pushes out the Prussians
 However, the Prussians push more reserves over the river to retake the village.

The French hang on destroying many of the Prussian units, although all French units are also severely weakened..

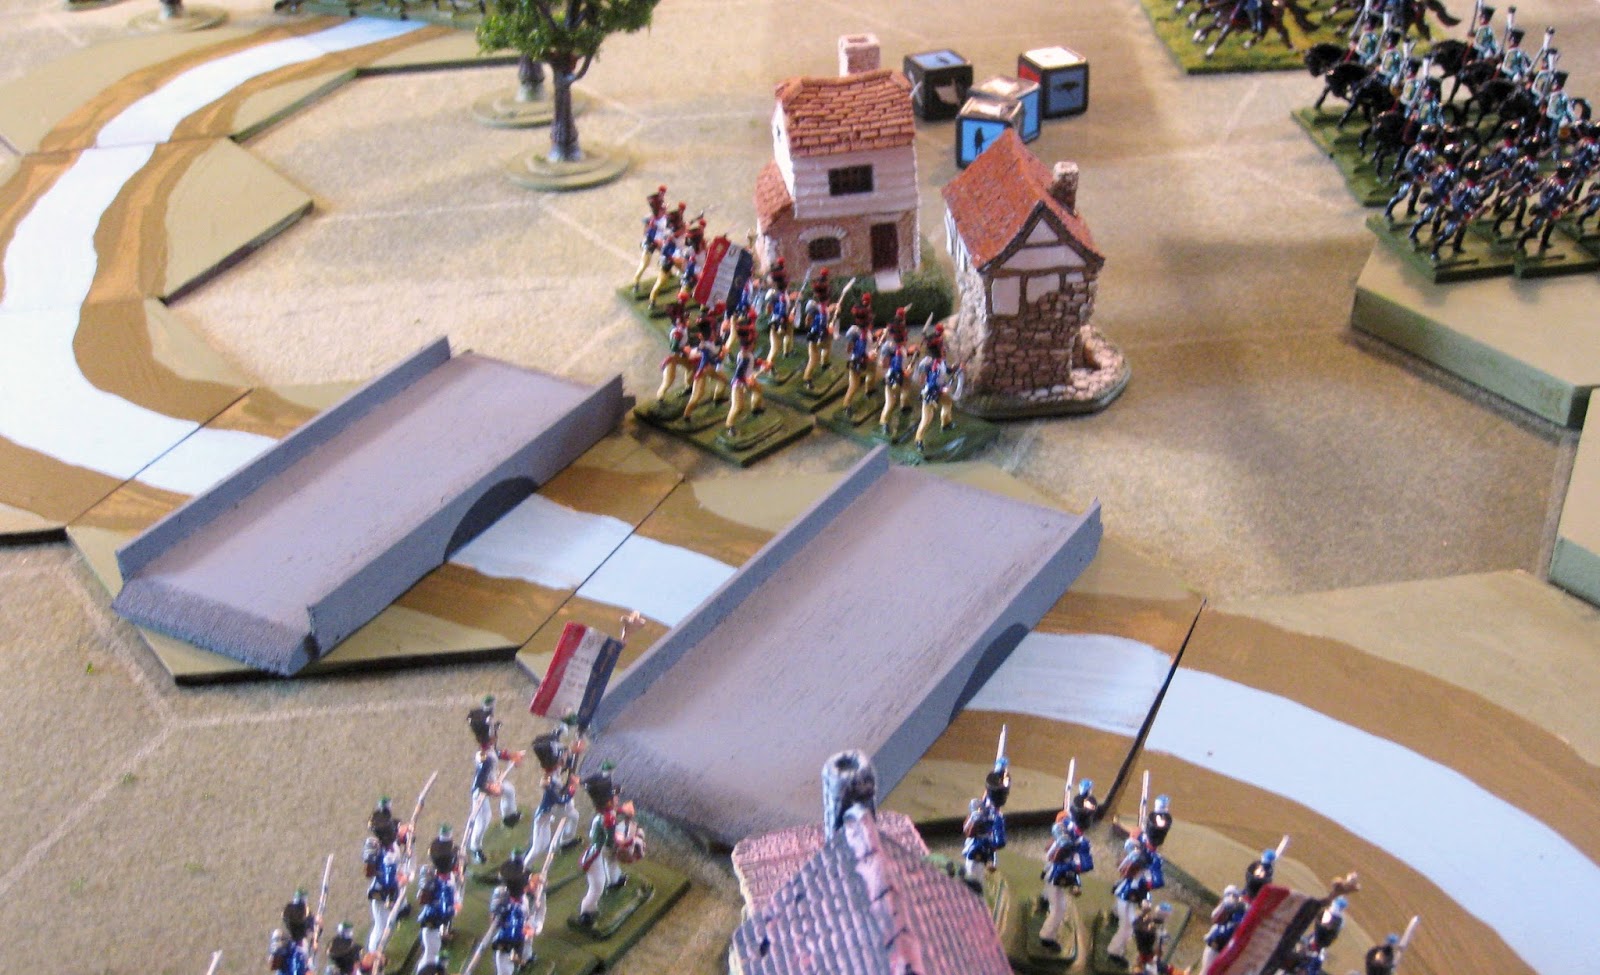
On the right flank the action around the village of Ligny follows a similar pattern, with French attacks being beaten off:

 The Prussian Jaegers are soon overwhelmed and the French take the right flank buildings;
 Once again the Prussians counter attack
 But are driven off
 Further French assaults destroy much of the Prussian infantry on the right flank and there are few Prussian reserves, having been committed to the action in the centre.
 A Prussian cavalry charge forces French guns to retreat, but has little effect on the French advance:
 And as Napoleon launches the Imperial Guard Prussian casualties tip the balance.
 The heavily depleted French win the day - just! The score is 11 - 9 to the French, although the left flank and centre were very much Prussian victories, but the massive French assault on the right swung the battle in favour of the French. This was an epic struggle and great fun to play. The battle could have easily gone the other way. Here is the map towards the end:


The French kicked off the battle with an attack in all three areas, but the cards dictated that initial emphasis should focus on the left flank, with a French attempt to take the village of La Haye:


In the centre there is a similar story with the battle for St Amand and the wood to the east. Initially the village is held by Prussian line infantry and jaegers:


On the right flank the action around the village of Ligny follows a similar pattern, with French attacks being beaten off:


Subscribe to:
Posts (Atom)