The final Turkish artillery unit is finished - this time from Strelets. Not really Crimean figures, these are from the Russo Turkish war series, but they look the part and will do nicely. I replaced the guns with some Napoleonic muzzle loaders:
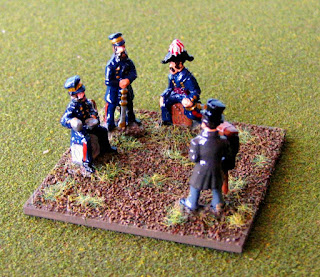
Meanwhile the British senior staff take tea and have their picture taken..............
Douglas Miniatures Logo

Sunday, 23 August 2015
Sunday, 2 August 2015
British Siege Artillery - Strelets
Having made the gabions it was time to finish off the guns and crews. This is the remainder of the British siege artillery set from Strelets, consisting of two heavy cannon and crews. Here is gun number one:
Gun number two:
The positions were made to sit together to form a battery. Others could be added:
Gun number two:
The positions were made to sit together to form a battery. Others could be added:
Saturday, 1 August 2015
Gabions
Continuing the work on my British siege artillery, I have been trying to develop some redoubts in which to position two large naval guns and their crews. Rather than just building earthworks I wanted to add some gabions - huge wicker baskets, filled with soil. I have some resin ones, but they are needed for my Russian guns, so I thought I would try and make some.
The biggest challenge was finding the right material to make the wicker basket effect. I tried all sorts of wire and plastic strip. In the end I settled for the wire off an old computer mouse cable, which contained four very thin wires about a meter long each.
The wicker basket is supported by wooden stakes driven into the ground and then held in place with soil. I needed to make four and began the first pair by cutting out two rough squares of 2mm thick card.
I then marked out where the wooden stakes would go
After this I drilled holes in the markers and inserted small lengths of wood cut from cocktail sticks:
Once this has dried (I used super glue), the fun bit began with weaving the wire around the stakes to create the basket:
Finally fine sifted sand was poured into the basket, which had a layer of PVA glue in the bottom. The sand was soaked with diluted PVA, with a dash of washing up liquid and the whole thing was left to dry. It took about two days to dry thoroughly, after which I painted the whole thing in dark brown:
I was quite pleased with the results. The next stage will be yo mount these on a base and add the guns and crews.
Subscribe to:
Posts (Atom)


