Douglas Miniatures Logo

Douglas Miniatures Logo

Saturday 24 August 2019

Soviet Reinforcements

Compared to my German forces, the soviets that I will be using for my mini campaign are a bit thin. During the last week I have been addressing this by increasing the number of infantry and armour units.

A new infantry unit, in the standard format of four rifle sub units, a mortar and machine gun sub unit and a command element:
These are all Airfix figures. I have always liked the machine gun and mortar teams and it is a shame that Airfix did not produce these for the other nationalities:
I also acquired two additional Roco Minitanks T-34s; one a 76mm gun version and the other has the longer 85mm gun:
To provide a reconnaissance capability I bought a trio of BA-10 armoured cars from BPM (Butler's Printed Models) - I am not aware of any 1/87 scale soviet armoured cars from other sources:
Finally some soviet heavy tanks in the shape of these KV-1As, also from BPM:
The soviets are just about ready to take to the field.


Tuesday 20 August 2019

A Clash of Steel - WW2 Western Desert

I fancied a quick tank on tank battle and thought I would give my Roco and BPM tanks an outing.

The scenario is that the British are defending a low ridge with anti-tank guns and 25pdrs dug in across the high ground. They have 2 x 25pdr, 2 x 2pdr and one 6pdr anti-tank gun units. In support is an tank regiment with Matildas, as well as two squadrons of Crusaders and a single squadron of newly arrived Grant tanks.


The Germans, whose task it is to capture the ridge, have six companies of Panzer IIIs and IVs. Notably one company is equipped with the long barrelled Panzer IV F2.

Dawn; the Germans begin their advance:
The 25 pdrs open up and a Panzer III goes up in smoke:
The Germans make their first move on the British right flank:
But the 6 pdr knocks out another German tank, a Pz IV D:
The Germans try to knock out the British anti-tank guns without success.

On the other flank, however, the Germans successfully engage and destroy on of the 25pdrs:

On the British left flank Crusader tanks rush towards the advancing Germans and fire into the sides of the slower German tanks:
A major tank battle begins on the British left and in the beginning the British Crusaders cause considerable damage:

Then, the German Panzer IV F2s enter the fray and soon the tide turns against the British Crusaders:
A Stug III advances and is quickly destroyed:
But, the German armour outclasses the Crusaders and soon they are overwhelmed:
On the British right flanks some of the Matildas rumble forward firing at the Germans, but their shells cannot penetrate the frontal armour of the German tanks. The Germans do not have this problem:
Although one Matilda gets a shot into the side of a Panzer III, destroying it:
The Germans push forward up onto the ridge and a mass of tanks fire at the anti-tank guns, destroying two more positions:
Meanwhile on the British left flank the F2s finish off the remaining Crusaders:
With the defence of the ridge crumbling, the Crusader squadrons destroyed and the Matildas taking a battering, the British commander decides to commit his Grants, and they begin to move forwards onto and left of the ridge, engaging one of the F2s, with devastating effect:

The Germans return fire but miss and the Grants take out a Panzer III:
And a second F2 loses a duel with the third Grant:
The Matildas too score a hit on a Panzer III and suddenly it is all over. The Germans are beaten off the ridge and having lost well over 50% of their tanks they must withdraw:

An excellent game that could have gone either way. The Crusaders sold themselves dearly and swung the action in favour of the British, with Grants delivering the coup de gras!


:


Sunday 18 August 2019

Mini Campaign - Operational Area

I have been looking for a suitable map of a section of European terrain on which to fight my campaign; and I found this pair of maps from the SPI board game 'Firefight':
The two maps join together several ways and are huge, about 4ft x 4ft. 

I have not gone firm on this map, but it does offer an extensive area with plenty of open going for armour and key features such as river crossings with a few settlements and wooded areas. Played up and down would offer the challenge of  an operation split by two river valleys, whereas, playing across the map would have several obstacles that would need to be negotiated.

Lots of food for thought!

Thursday 15 August 2019

Soviet Forces Muster

My soviet army is coming together quite well, although I think I need a little more armour and infantry, given the size of the area they are to defend:
The figures are mostly early Airfix and the armour is 1/87 scale, mostly Roco Minitanks.

Wednesday 14 August 2019

A Commotion Within the Shire

Now Cuthbert is a bad man, he and previous generations of his family, through theft, violence, forced marriage and swindles, have gained vast areas of the shire amassing huge wealth. However, Cuthbert was invited by the King to partake in the war in France, where he and other nobles formed a contingent of the English army.  While Cuthbert was away at war, his main rival and neighbour, Rupert, decided to move. After a few skirmishes much of the land taken by Cuthbert is recovered. However; Cuthbert soon learns of these developments and gains leave from the King to return to England.

On arrival at the shire Cuthbert is greeted by a small army consisting of aggrieved nobles and hired knights blocking his path along a low ridge.  Cuthbert deploys his men and the two forces prepare for battle. His forces are at the bottom of the table.
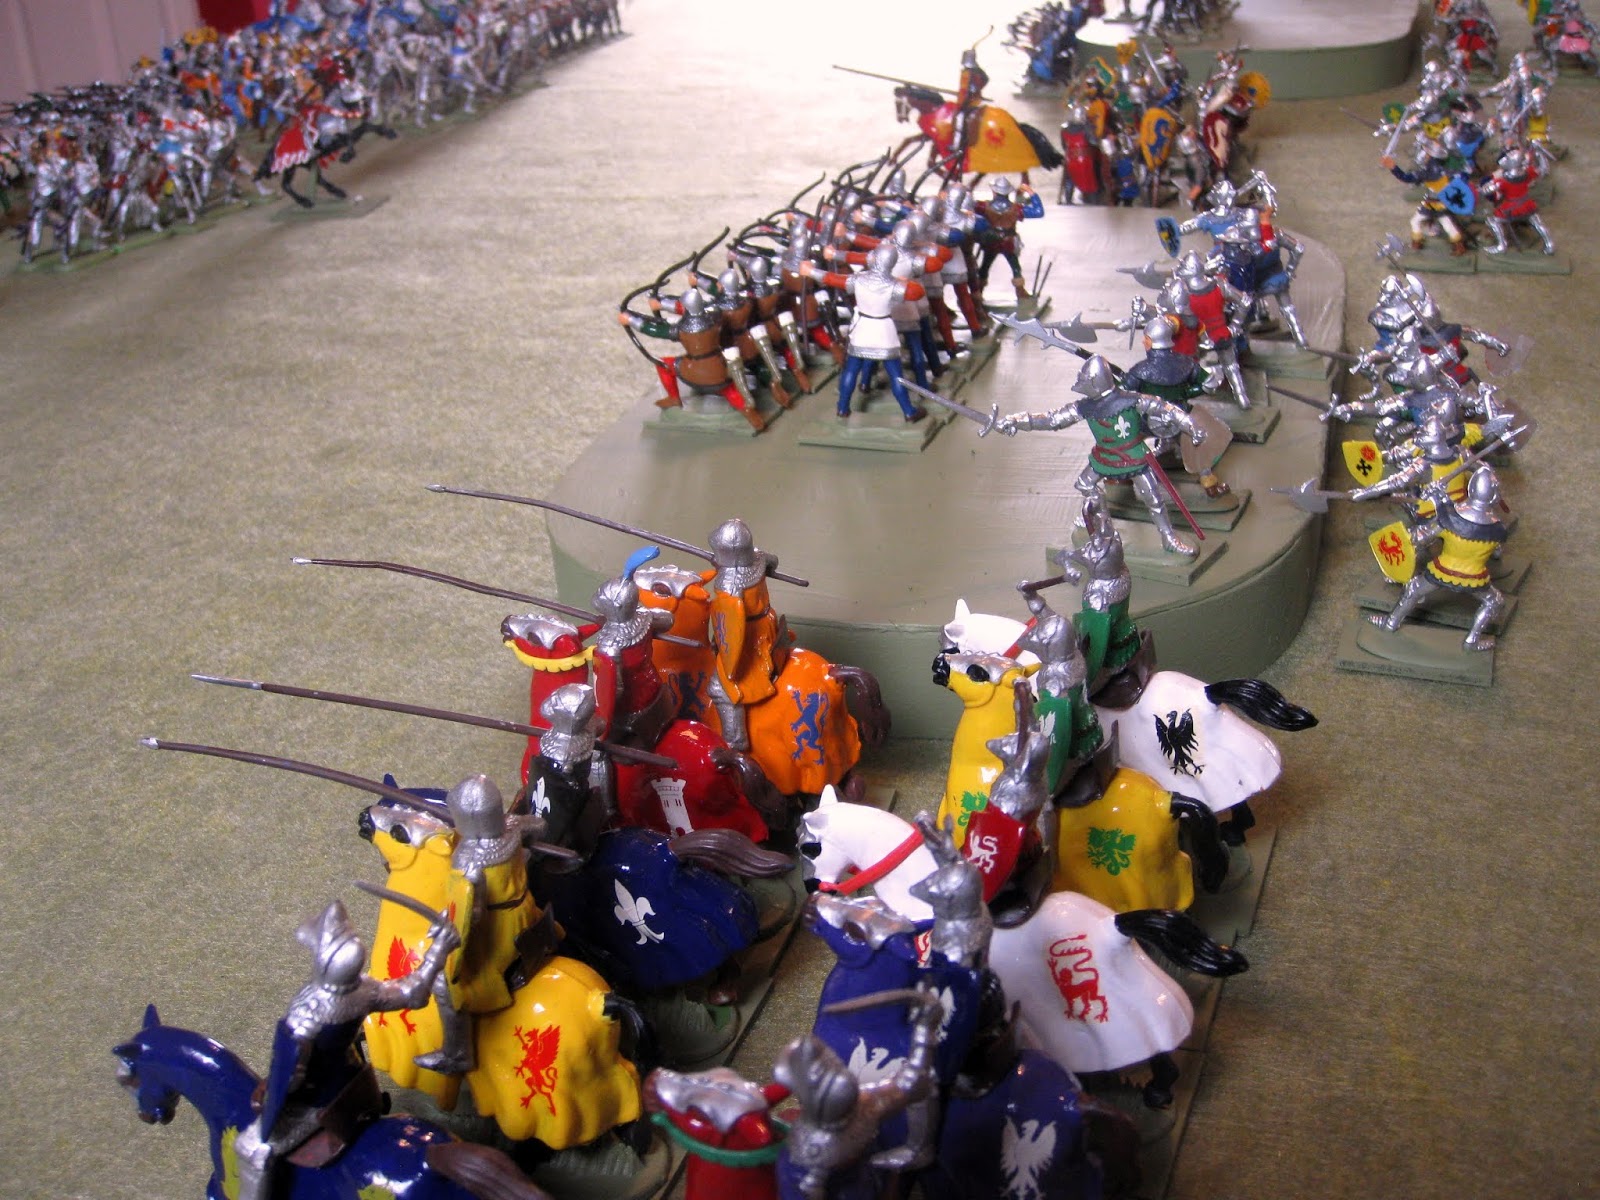
Both sides have a mixture of foot and mounted knights and men at arms, archers, Rupert also has some crossbows. Looking along Cuthbert's right flank:
And Rupert's left left:
The two leaders ride out to confer and decide on how the battle should be fought, but this soon breaks down into loud cursing and swearing:
The leaders return to their lines and Cuthbert orders his archers to deploy forwards:

There follows an exchange of fire and both sides take some casualties amongst their archers and crossbow men.

After a few volleys of bolts and arrows Cuthbert's cavalry move forwards on both flanks, feeling confident as they outnumber Rupert's mounted knights, the two sides clash:
A cavalry melee develops on both flanks and Rupert's men take more casualties, here is the other flank:
And Rupert's cavalry breaks:
As this is going on, the archers continue to fire and Cuthbert orders some of his foot soldiers to advance to take the high ground:
A bitter struggle ensues and initially Rupert has the edge, but more of Cuthbert's men join the fray:
Over on his right flank, seeing his cavalry turn tail, Rupert deploys some pikemen to deter the cavalry from turning his flank:
Only just in time as Cuthbert's knights storm up the slopes:
but, the horses are blown, and take many casualties fighting a wall of pikes uphill.

Cuthbert orders more of his infantry forwards and  a series of melees occur across the field; the crossbowmen are badly beaten and flee.

Then, Rupert's cavalry on his left flank break and this allows Cuthbert's knights to swing around the flank;
The mounted men sweep away Rupert's archers and in behind his lines:
At the same time riding at the head of his reserves, supported by his archers Cuthbert moves into the centre. Rupert decides that the day is lost and he and his knights flee the field. There will be terrible retribution at the hand of Cuthbert!

All figures are 1/32 scale. Cuthbert's troops are Britains Deetail, while Rupert commands a mix of herald, Revell, Italeri, Timpo and Accurate figures.  I borrowed the fast play rules from the internet, adding some morale and fire factors.


Thursday 8 August 2019

Soviet Artillery and Air Support

As part of the preparation for my forthcoming WW2 mini-campaign, I have completed the artillery support of the Soviet forces, along with some aircraft.

The guns are metal and by Irregular Miniatures, from their Really Useful Guns range and are scaled at somewhere between 15 and 20mm. Exactly what I needed to go with my Roco tanks and vehicles. The crews are 20mm, but on the small side and work well with the Airfix Russians:

First there are two field gun units, equipped with 122mm guns:
Second, we have two units of heavier 152mm guns:
I have also created some air support, in the shape of 2 x IL-2 ground attack aircraft and two La-5 fighters:
The aircraft are 1/144 scale by Zvezda.