Douglas Miniatures Logo

Douglas Miniatures Logo

Monday 21 August 2023

A Poke in the Eye - Tank Action

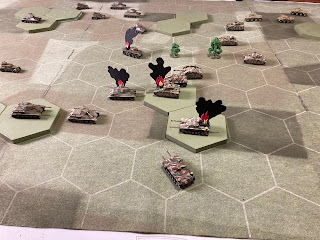
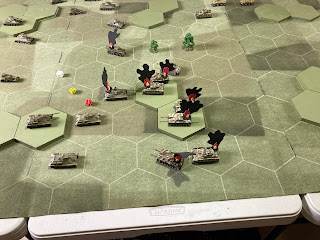
 With a spare hour or two, Will and I decided to play a quick WW2 armoured engagement.  Sides and units were decided by dice throws. I sniggered inwardly as I got a German force and even more so as I was given some Panzer IVs, a Stug III platoon and some heavy armoured cars.  Will ended up with the Soviets, mostly T-34 76s, some amoured cars and a handful of T-34 85s.  This should be a walk over methinks.

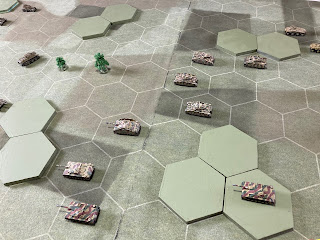
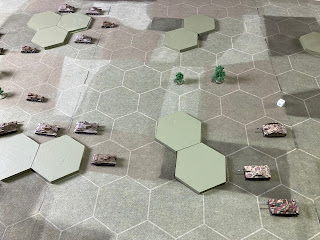
The two forces were placed on a table of rolling open eastern European countryside.  


My plan was to bring my tanks up to a ridge and pick off his tanks as they emerged into the open ground. My Stugs sat poised behind the rise in front of them.


 The PZ IVs moved up in support:


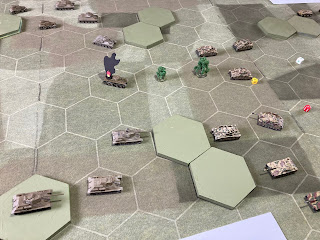
My first success was the elimination of a BT-7 light tank, using my Stug tank destroyers:

As my plan unfolded my armour deploys onto the crest to take on the exposed soviets:
But my tanks are not shooting well and one of my Stugs is hit.
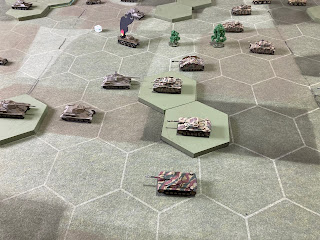
However, a T-34 is also taken out, but a PZ IV that joins the battle burns on the ridge:
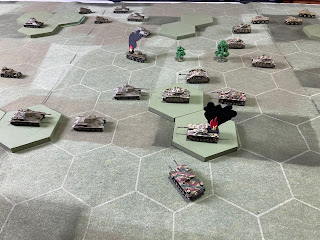
Then things go bad for the Germans.  The dice gods are not friendly as round after round bounce off the soviet armour.  All the while German tanks are slammed by 76 and 85mm rounds. Soon the German defence of the ridge is defeated, with half of my tank force on fire and the Soviets continue to advance:


Suddenly it is all over, the Germans are defeated 6-2 and withdraw the remnants of the force to lick their wounds.  

All of the model tanks were Roco Minitanks, apart from some 3D printed Armoured cars.  The rules used were my own home grown 'Tank Action' rules, which I have explained elsewhere on this blog.


Thursday 17 August 2023

Balaclava Revisited - Battle Report

 I have played variations of the Battle of Balaclava several times in the past, however, the presence of Phil and Will presented an opportunity not to be missed.  My Douglas Miniatures 20mm Crimean troops would take to the field once more.

The stage is set.  A huge Russian force surprises the mainly British and Turkish allies, as it advances towards the Turkish manned redoubts on the Causeway Heights.  Masses of cavalry and infantry move southwest in the general direction of the port of Balaclava.

The British Light Brigade, having had theit breakfast disturbed, mount up with the Heavy Brigade in the background, as the allied General Staff look on from the Sapoune Heights
The outer perimeter of Balaclava is lightly defended by a mix of Turkish and British troops, including the famous 93rd Highlanders 'thin red line'.
Russian infantry are already making their way along the Causeway Heights, capturing the first redoubt, while masses of Russian cavalry advance with artillery support.
The battle along the Heights proves to be a tough fight.  Having secured one redoubt the Russians attempt to drive off the remnants of a Turkish battalion.
The attack succeeds, but the Turkish guns rip through the supporting Cossacks:
The Russians move some artillery into the captured redoubt and infantry attempt to assault the second redoubt, with its steadfast Turkish supporting battalion.
The Russian assault is repelled with heavy casualties.
The situation after the stalled first Russian assault, as more Russian battalions move forward.
Russian cavalry eventually sweep the Turkish infantry off the ridge, but the stubborn Turkish artillery continues to hold out causing more casualties.
Meanwhile, the British reinforcements, consisting of the leading elements of the 1st Division arrive in the field.
With the arrival of allied reinforcements the pressure was on for the Russians to break through.  A large cavalry force begins to move around towards the British right flank.  
While this is going on the battle for redoubt number two continues.
The Russian cavalry that swept around the right flank smashes into the British Royal Marines.  The Marines are over run, but they cause massive casualties amongst the Russian cavalry, supported by allied artillery
The British 8th Hussars sweep forward and drive off the Russian infantry, but unsupported they are driven off as they run up against Russian cavalry and artillery. Still the Turkish redoubt holds out.
A fresh Russian battalion moves along the ridge and at last the Turks are overrun, as more Russians advance to exploit the success.  However, Russian casualties are now very high.
In order to prevent the Russians from occupying Redoubt 2, the Scots Greys charge into the Russian infantry. Again unsupported, the Greys are destroyed. 
However, over towards Balaclava the last of the Russian cavalry is destroyed and the Russian assault ends.  It is an 8 -5 victory for the allies, although they will have to fight to recapture the Causeway Heights - maybe it is time for "Lord Raglan wishes the cavalry to advance rapidly to the front to try to try to prevent the enemy from carrying away the guns".....But that is another story!
The game was played with modified C&C battlecry rules, on a hex board.  The figures are all 20mm, mostly Douglas Miniatures, with a few others added to make up the numbers.  This was an excellent game.  If the Russians had not thrown away four regiments of cavalry on an attempt to break the balaclava defences the result might have been different.


Thursday 10 August 2023

Battle Report - Essling 21 May 1809

 We had a busy few days wargaming this week.  Phil paid a visit on Monday - Wednesday and Will joined us on Tuesday.  We three enjoyed a few days of wargaming, eating along with some beer and wine.  In all we fought Essling, Balaclava, an 1866 Austro Prussian engagement and a Spanish Peninsula War action.

Our first battle was Essling.  

The French having crossed the Danube were counter attacked by the Austrians under Archduke Charles, and the pontoon bridges required by the French for supply and reinforcements were destroyed by the Austrians.  The French that had managed to cross the Danube established a defensive bridgehead using the two villages of Aspern and Essling as anchors.  Huge numbers of Austrians advanced to eliminate the French army. Several French attempts to break out had been beaten back.  

This game concentrates on the action in and around the village of Essling. The central feature is the village of Essling itself, with the enormous stone granary, forming a massive strongpoint:


The view from the Austrian side:

The battle began with some probing attacks by the Austrians; with some infantry that were raked with artillery and musket fire and light cavalry on the left, being driven off by French horse artillery:
The French light cavalry charged into the disorganised Austrian infantry sending them reeling:
The situation on the left is temporarily restored, but the Austrian heavy cavalry charge forward:
They are met and destroyed by French Cuirassiers and destroyed.
Austrian attention shifts to the right flank.  Three large columns advance towards the walled area known as the Long Garden, held by French light. The assault by the Austrians is checked but the French light suffer heavily.
The Austrians pour in more troops and eventually the French light are overwhelmed, giving the Austrians control of the French right. The French begin to organise a counter attack.

Supported by artillery, a second French light battalion advances on the long garden.
The Austrians counter attack and despite causing some more French casualties, they are destroyed.  A similar assault against the French artillery fails as the Austrian column is torn apart by close range artillery.
The remnants of the Austrian column pulls back into the long garden and is finally finished off by French infantry and artillery.  For the time being the Long Garden is secured once more.


Over in Essling village the French mount a small counter attack with two fresh infantry battalions, pushing back the Austrians before them.
The French counter attack is successful but they begin to suffer in the open ground outside the village.
The Austrians counter attack with their heavy cavalry causing more French casualties. The surviving French retreat back into the Granary.

The Austrian heavies are met by French cavalry and horse artillery, as well as musket fire from the buildings.  The Austrian horse dissolves
Suddenly it is all over.  Archduke Charles is shocked by the unsustainable level of casualties and begins to pull back.  The exhausted French take the opportunity to withdraw back across the Danube.  With a score of 8 - 4 to the French it is a resounding victory, however, most of the French units have casualties.
This was a great game that somehow reflected the historical action of 1809.  

All the figures are Warrior castings, originally from the collection of Jef, who was responsible for the wonderful painting.  The rules were used were Command and Colors, using the game cards rather than our usual action points methods.


Monday 7 August 2023

More Russians Restored

 As I was clearing out one of the corners in the war room, I found a long forgotten box of Minifigs S Range Russians,

For the past ten days I have been gradually restoring them and putting them in new bases.  There are five infantry battalions, an artillery battery and a regiment of Hussars.

My growing Russian force now has 20 battalions: