Douglas Miniatures Logo

Douglas Miniatures Logo
Showing posts with label Crimean War. Show all posts

Thursday, 17 August 2023

Balaclava Revisited - Battle Report

 I have played variations of the Battle of Balaclava several times in the past, however, the presence of Phil and Will presented an opportunity not to be missed.  My Douglas Miniatures 20mm Crimean troops would take to the field once more.

The stage is set.  A huge Russian force surprises the mainly British and Turkish allies, as it advances towards the Turkish manned redoubts on the Causeway Heights.  Masses of cavalry and infantry move southwest in the general direction of the port of Balaclava.

The British Light Brigade, having had theit breakfast disturbed, mount up with the Heavy Brigade in the background, as the allied General Staff look on from the Sapoune Heights
The outer perimeter of Balaclava is lightly defended by a mix of Turkish and British troops, including the famous 93rd Highlanders 'thin red line'.
Russian infantry are already making their way along the Causeway Heights, capturing the first redoubt, while masses of Russian cavalry advance with artillery support.
The battle along the Heights proves to be a tough fight.  Having secured one redoubt the Russians attempt to drive off the remnants of a Turkish battalion.
The attack succeeds, but the Turkish guns rip through the supporting Cossacks:
The Russians move some artillery into the captured redoubt and infantry attempt to assault the second redoubt, with its steadfast Turkish supporting battalion.
The Russian assault is repelled with heavy casualties.
The situation after the stalled first Russian assault, as more Russian battalions move forward.
Russian cavalry eventually sweep the Turkish infantry off the ridge, but the stubborn Turkish artillery continues to hold out causing more casualties.
Meanwhile, the British reinforcements, consisting of the leading elements of the 1st Division arrive in the field.
With the arrival of allied reinforcements the pressure was on for the Russians to break through.  A large cavalry force begins to move around towards the British right flank.  
While this is going on the battle for redoubt number two continues.
The Russian cavalry that swept around the right flank smashes into the British Royal Marines.  The Marines are over run, but they cause massive casualties amongst the Russian cavalry, supported by allied artillery
The British 8th Hussars sweep forward and drive off the Russian infantry, but unsupported they are driven off as they run up against Russian cavalry and artillery. Still the Turkish redoubt holds out.
A fresh Russian battalion moves along the ridge and at last the Turks are overrun, as more Russians advance to exploit the success.  However, Russian casualties are now very high.
In order to prevent the Russians from occupying Redoubt 2, the Scots Greys charge into the Russian infantry. Again unsupported, the Greys are destroyed. 
However, over towards Balaclava the last of the Russian cavalry is destroyed and the Russian assault ends.  It is an 8 -5 victory for the allies, although they will have to fight to recapture the Causeway Heights - maybe it is time for "Lord Raglan wishes the cavalry to advance rapidly to the front to try to try to prevent the enemy from carrying away the guns".....But that is another story!
The game was played with modified C&C battlecry rules, on a hex board.  The figures are all 20mm, mostly Douglas Miniatures, with a few others added to make up the numbers.  This was an excellent game.  If the Russians had not thrown away four regiments of cavalry on an attempt to break the balaclava defences the result might have been different.


Thursday, 27 July 2023

An incident on the road to Sebastopol

This imaginary scenario sees the British army in October 1854 running up against a hasty defence by a Russian rearguard.  The Russians have established themselves on a line of low hills straddling the road to Sebastopol, in order to delay the Allies and allow the Russian field army to withdraw.

Here are the Russian positions, with six battalions of infantry and a couple of artillery batteries either side of the road.:

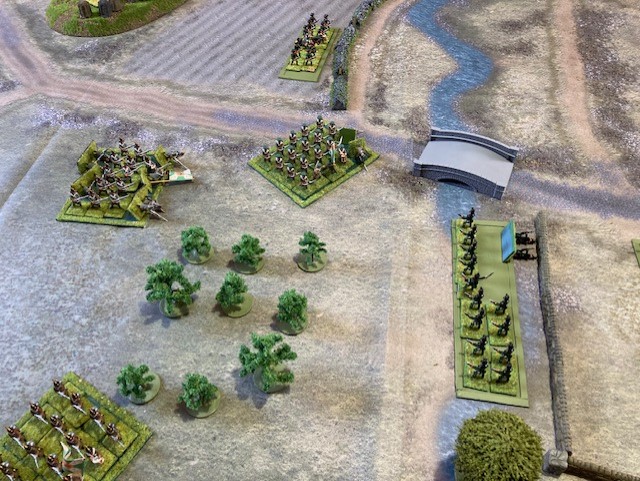
The Russians have pushed forward some rifle armed skirmishers up to the river behind some stone walls.

The British are advancing on a broad front with three brigades, supported by artillery and light cavalry in the vanguard

The action begins with the British moving the Rifle Brigade up to the river line and an advance by some of the Scots and Guards. As they advance the Russian batteries on the hills open up, cutting down some of the Black Watch.

At the same time the Russians push forward three massive columns of infantry, in an attempt to hold the river line, all the while the British take casualties from the guns;

The British artillery fires into the Russian columns.


The Rifles take even more casualties, but from the shelter of the river bank pour fire into the central column:


Whilst the brisk action with the Rifles goes on, the Guards and Highlanders continue to advance upon the river, as a third Russian column edges around the small plantation:


The Rifles are taking a heavy toll on the Russians, but are themselves in trouble and in danger of being overwhelmed.

However, the Black Watch and the Guards arrive in time to save the Rifles, pouring fire into the dense columns.  The British in line with Minie Rifles outgun the musket armed Russians in their tight packed formations:
The combination of artillery fire and the Russian skirmishers cause heavy casualties amongst the grenadier Guards
But the arrival of the Black Watch halts the Russian column skirting around the plantation, saving the Rifles.
Now, the Russians are subjected to a punishing rain of fire.  The three columns are torn to pieces, as are the Russian skirmishers, who have been pushed back:


The British move across the river, driving the Russian columns before them:
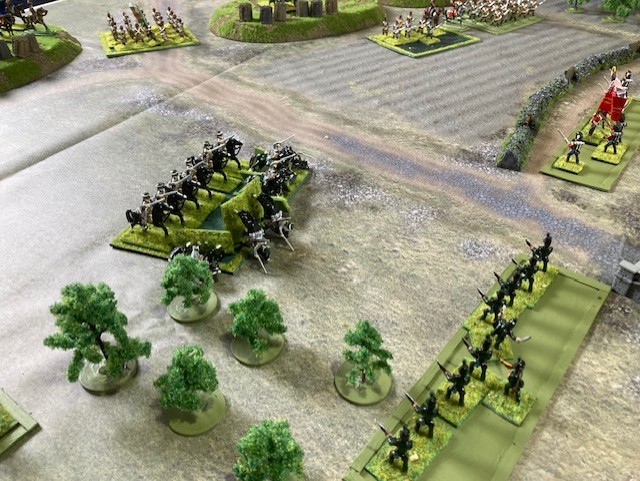
As the Black Watch emerge from the river, they are charged by Russian dragoons.  With the Highlanders in line, they pour down devastating fire which cuts down the horsemen.
A second Russian dragoon regiment thunders towards the Rifles who, supported by the Grenadier guards and an artillery battery, also cut the cavalry to pieces.
Two fresh Russian columns counter attack against the two Guards battalions, that are now standing behind the stone wall.  The Minie Rifles once again devastate the close packed Russian infantry, halting the columns in their tracks.  
With six Russian battalions destroyed, along with two cavalry regiments, the Russian commander feels that he has delayed the British as long as he can and he withdraws his forces from the field.

The battle ends.  All the figures are from the collection of the late Alan Cook, consisting of Miniature Figurines S Range figures and some conversions.


Tuesday, 9 November 2021

Brief Encounter - Crimean Skirmish 25th September 1854

This rather strange action is based upon an incident at a remote location on Mackenzie heights, known as Mackenzie's Farm, when the British army blunders into the tail end of Russian Prince Menschikov's field army that had departed Sebastopol to protect Russian lines of communication.

An abridged version of events from Cadogan's Crimea, published in 1856:

............. Lord Raglan followed the road which the artillery had been ordered to take and trotting on, placed himself at the head of the column on the line of march. After proceeding for about four miles through the forset the trees became thinner, and it was evident that we should soon be clear of them.  Lord Raglan had been there for some time wondering that we had not come upon the cavalry, who had been ordered in advance, and therefore sent two staff officers into the wood on our right to try to find them. Two hussars  and a staff officer up ahead reported sighting Russian troops on the road just in front of them. General Airey rode forward with his ADC to see what they were and returned minutes later and announced that they had seen a Russian convoy or troops on the line of march passing northwest along a road at right angles to the one we were on. More staff officers were sent off to find the cavalry and the 2nd Rifles were ordered to hurry up. The horse artillery were ordered to readiness and to advance immediately the cavalry got up.

A contemporary map of the area:


This is where I join the action, with the 2nd Rifles moving forward and the horse artillery deploying.

The board is set up showing the road with the Russian column of wagons, infantry and Cossacks:

Lord Raglan and his headquarters emerges from the woods:

While the cavalry that should have been in the vanguard blunder along the wrong track:

At this point the Russians spot the British and raise the alarm:


Raglan sends a staff officer to recall the cavalry and the horse gunners move into the area of the farm to deploy while the Rifles move up. However, a Russian battlaion deploys across the British front and begins firing at the British artillery:


In this battle the Russian continually gain the initiative, while the British are in chaos. Russian musket fire starts to topple the British gunners and a regiment of Cossacks deploys to support their infantry:

The Cossacks charge the rifles who while deploying into line manage to loose off a volley into the Russian cavalry, but the Cossacks make contact with the British infantry:

The Rifles are cut down and break and run off into the trees.  Meanwhile the Russian infantry close in on the horse artillery in the farm and cut the gunners down. 

As all this was going on the Scots Greys arrived having newly arrived in the Crimea and having missed the Battle of the Alma were keen for some action.  They charged headlong into the Cossacks sending them packing:

However a second Russian infantry regiment had deployed to the front of the Scots Greys and the Russians, now in the farm, began pouring volleys into the exposed British cavalry.  Casualties were heavy and the Scots Greys retreated back down the road:

With the British beaten off the Russian columns and wagons were able to move off unmolested and the action was over.

A clear win for the Russians!

In the real action, which saw the British commander through error being at the point of the column,  the Russian battalion loosed off a volley or two which went over the heads of the British with no effect.  The artillery and rifle fire caused the Russians to turn on their heals and they fled. Little more happened and the British captured the wagons, tons of supplies, some drunks and a lot of loot, although a few Scots Greys were killed by Russians that played dead amongst the baggage. 

The figures used are S range Minifigs, originally from the Alan Cook collection. Rules were adapted from C&C Battlecry.


Wednesday, 28 October 2020

Autumn Review - British Army of the Crimea

 In rather the same format as my other Crimean autumn reviews of the the combined collections of Alan Cook and my own, there follows a series of pictures of the British Army.  There is a slight problem in that I have two Light Brigades on parade and more highlanders than were available at the time, however, It all comes together to make a fine collection.

I will let the pictures tell the story: