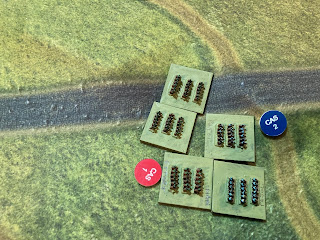
The Battle for the Ridge
With Hougoumont now in French hands, Reille orders his brigades to push in to the allied right. At the same time his second Division is on the move to reinforce those already committed.
Having forced the Brunswick brigades into square Reille's artillery pounds the German soldiers that are pinned by Pajol's cavalry. However, the British cavalry brigades of Vivian and Grant arrive and counter attack the French horse. This cavalry battle is set to last for most of the game.
The cavalry action leads to casualties on both sides:As the cavalry battle it out Reille's infantry around Hougoumont, now reorganised, advance on the trapped Brunswickers.
The Brunswickers, unable to change formation are suffering heavily as the French infantry batter them.
Seeing the emerging threat on his right flank, Hill orders three Hanoverian brigades up to support the beleaguered Brunswickers.
The Brunswickers have collapsed but in the nick of time the Hanoverians, with Hill's artillery block the French. However, the remainder of Reille's corps is beginning to arrive
The French assault the Hanoverians, destroying a brigade. The British 1st Division is unable to assist in the background as Reille's 2nd Division is fast approaching. To bolster up the Hanoverians, two Dutch brigades are ordered over to the right.
Napoleon's plan is beginning to unfold. The French assault on the right is drawing off allied units weakening their centre. Over on the allied right the French cavalry have forced back Vivian and Grant's brigades and once again the allied right is exposed. More allied cavalry from the KGL and Hanoverians move into position.
Despite causing casualties to the French, the Hanoverian infantry is heavily reduced, with just one brigade left intact. The cavalry are once again locked in combat. The allies come off poorly during the initial stages.
Seeing the threat from Reille's 2nd Division the Guards of the British 1st Division charge down the slope and crash into the French, causing many casualties, weakening French morale.
The final Hanoverian infantry brigade collapses, allowing the remnants of Reille's 1st Division to swing around onto the flank of the British Guards
The French 2nd Division is badly mauled but the Guards too are now in trouble with the threat to their right flank. In the background Dutch reinforcements can be seen.
The Dutch hurry down the road to support the right.
Sensing that the Allied centre has been weakened, Napoleon orders the 3rd and 2nd cavalry corps of Kellerman and Exelmans up to support Reille. In the background, Lobau's infantry corps advances towards the Allied centre, planning to strike to the left of La Haye Saint.
Meanwhile, back on the ridge the British Guards are hanging on, having defeated Reille's 2nd division, but are now under pressure from the French 1st Division moving in from their right. French cavalry have forced a square to be formed. This is being bombarded by French artillery.
Also, the two Dutch brigades have arrived just as the Guards collapse under French pressure.
The Guards and Dutch form a defence line;
Meanwhile Pajol's cavalry continue their struggle with their allied opposite numbers.
With the last of the Guards out of the way, Reille's Corps (now seriously depleted) fires volleys into the Dutch lines.
The situation is looking bleak for the allies. This overview shows the battle for the ridge on the allied right. In the centre Kellerman's Cuirassiers are now engaged with Ponsonby and Somerset. Exelman's corps sits in reserve, In the background Lobau's infantry begin to climb the ridge.
A huge cavalry battle unfolds in the centre between the French and allied heavies. Excelman's corps joins the fray as Somerset and Ponsonby are reinforced by Hanoverian light dragoons. Lobau's corps now moves up to the left of La Haye Saint and Reille continues his fight against the Dutch on the far left.
Pajol's exhausted cavalry finally succumb to the allied horsemen and retreat down the road.
Battle is joined on the ridge. On the far left, the remnants of Reille's corps have defeated the Dutch infantry. The French heavy cavalry are gaining the upper hand and Lobau's infantry are forcing their way onto the ridge
The allies are crumbling and now Napoleon sends in the Imperial Guard to support Lobau. D'Erlon's Corps is preventing the Allied left from swinging around to reinforce the ridge. For Wellington it is time to withdraw.


.jpg)
.jpg)


.jpg)


