Douglas Miniatures Logo

Douglas Miniatures Logo
Showing posts with label 20mm. Show all posts

Tuesday, 29 July 2025

Russo Japanese war 1905, Jacklex Russians

 Finally, I have finished basing the last of the Jacklex Russians.  Thee was a lot of them.  I still have some unpainted figures and a few odds and ends to sort out, but the bulk of the collection is now ready for action.

Here is an overview of the Russian army:

The artillery:

Army command:
The rest of the artillery:


The cavalry Brigade:
The infantry:


The Cossack Brigade:

I'm working on some more Red Army troops and then back to the Great Plastics Revival - unless i get distracted again!


Thursday, 24 July 2025

Jacklex Japanese Army

 As mentioned in my previous post, I have acquired a couple of 20mm Russo Japanese War armies.  I have been organising them to suit my rules and table layout.  The figures are by Jacklex and were used by the ABC Wargamers, having been produced by Jack Alexander.  The figures were recently available online for sale, but sadly the shop has now closed.


Here are the Japanese:

A close up of some Infantry:

And a cavalry regiment:

The Russians are nearly finished too and I will share some pictures soon.


Monday, 7 April 2025

The Rape of Piddlington - an AWI scenario

 Phil popped over for a couple of days, allowing us the opportunity to put some figures on the table and to play a game:

The peace and quiet of the tiny hamlet of Piddlington is shattered by the fateful cry, "The British are coming".  Unfortunately for Piddlington it has been chosen as an American weapons and ammunition storage site, that has come to the attention of the British commander.  He has ordered a small force to go and destroy the facility.  Word of the plan has reached the Americans and the local Piddlington militia has deployed and a request has been sent for reinforcements.


Soon the red coats of British grenadiers can be seen approaching down the long road leading to the settlement:

Aware of the experience of others of being ambushed in the wild country, the British commander deployed a couple of battalions on each flank to protect the main force, consisting of the commander, a field battery, the grenadiers and a second line battalion.

A Hessian battalion works its way along the left flank:
Meanwhile, the Piddlington town guard has deployed onto a rocky mound adjacent to the road, hoping they can delay the British until reinforcements arrive:
In the settlement itself is a battalion from the county militia and a light gun:
Seeing little opposition ahead, the British send the grenadiers forward to clear the mound, supported by the gun and the line battalion.  A brisk fight enshews and although the town guard take casualties they cling on and deny the grenadiers from taking the little hill.  The county militia move down the road to meet the threat, but suffer casualties from British volleys. After another turn, the county militia break and run from the field:
With nothing to stop them the two right hand British battalions continue to work their way around the right flank.

More American reinforcements arrive and the village is now quite strongly defended:

On the British left the Hessians and British battalion close on the outskirts of Piddlington.
The fighting on the approaches to Piddlington intensifies, with the Town Guard still managing to hold off the British grenadiers.  Two American battalions storm down the road and rout the British line battalion there, but lose one of their own in the process:

With the road clear the Americans charge down the British battery, but run into a hail of grapeshot and are shattered.
The Town Guard numbers fall every turn and having put up a heroic fight they crumble:
The battered British Grenadiers gain the mound, but come under fire from the village.

The British grenadiers decide to pull back from the summit of the mound and await reinforcements.
The Hessians arrive and the British gun moves up with the commander. Also on the British right the two battalions begin to engage the American left.
Although the Hessians are forced back by the American artillery, the other British battlion begins to engage the American gunners.
The British battalion on the left attacks and destroys the American gun.  The American left collapses as two British battalions attack the now thin defences.  Suddenly it is all over, as the American left disintegrates their exhaustion point is reached and the remaining American units pull out of the village.  
The British set about destroying the stores and set fire to the buildings.  The battle became known locally as 'The rape of Piddlington'.

For rules we use Command & Colors Tricorne, and the figures are mostly Airfix plastics, with some other brands thrown in. This proved to be a very enjoyable game.


Friday, 28 March 2025

Jacobites

 I recently acquired quite a large late 17th early 18th Century 20mm army, consisting of six battalions of line, two of horse and some grenadiers.  My plan is to pitch these troops against my Jacobites.  However, a quick review of my Jacobite army in this scale was sadly lacking, so I decided to remidy matters.

After some thinking I purchased several boxes of Strelets 1/72 plastic figures and set about painting them. I didn't want to spend an age on the figures, so I tried something that I have not done before, using techniques employed when painting 6mm figures.  I first sprayed the figures in black primer, then, as I was going for en masse units I added blobs of colour to bring out the weapons, clothing and skin.  I found that I was able to paint 60+ figures in two days.

The results are not pretty, but with a crowd of Highlanders gathered together on bases and viewed on the table they look OK.  Here is the result:


I have bought another box of figures and a load of musket armed 20mm metal figures from Newline to go with these.

Monday, 23 September 2024

Rolica 17 August 1808

 This is a battle in the Command & Colors scenario book that I have been wanting to try for several years.  However, a visit by Phil and the fact that Will had deposited his 20mm Anglo/Portuguese army, along with his French for safe keeping presented an opportunity not to be missed.

So, the table was set out as per the scenario we chose sides; I was the Anglo Portuguese while Phil played the French.


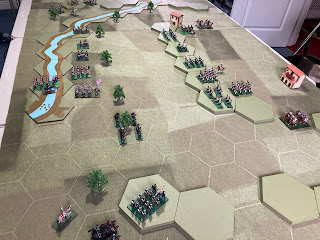
Having set out the scenery, this is the table ready for play:

A view across the battlefield, with the French firmly installed upon the long ridge.
As the Allied commander, I thought that this would be quite an easy action.  How wrong I was! My plan was to demonstrate on the French left, with the hop of drawing off reserves from the centre, attack in the centre to pin the French on the ridge and then sweep around the French right flank.  First of all I needed to clear the river and bring my artillery into range.  The British battalions under the command of Wellesley wade across the river and secure the far bank.

Over on the Allied left flank the Fergusson's British move more cautiously, as Phil deploys some light cavalry round the rear of Rolica village.
Meanwhile, Trant's Portuguese, supported by some Cacadores and cavalry advance on to the French left.  the French counter move with some light troops and hussars.
British light infantry hold a wood to secure the crossing, but cannot advance due to the cavalry threat
Over on the Allied right, the French counter attack causing casualties amongst the Cacadores, who are forced into a close combat brawl.
The French Hussars attack and drive off the Portuguese cavalry, while the Portuguese line are pushed back having also suffered casualties.
With the Portuguese attack being largely blunted a second Portuguese line battalion moves up to stabilise the situation.
Although the Allied right flank attack was repelled quite quickly, in the centre the british battalions, having crossed the river, move towards the ridge.  It looks a daunting task.
An over view of the situation at this point.  Allied artillery now has the range of the French on the ridge, as the British attack goes in.
Predictably, the British battalions suffer heavily and pull back, but another battalion moves up in support.
A further British battalion crosses the river on the left, mindful of those pesky French Hussars.
On the Allied left things are more successful.  Led by General Fergusson, a battalion moves around rolica village and begins to climb the ridge, having driven off the French Hussars.
While this is going on Wellesley rallies the British battalions in the centre and moves once more towards the ridge.
battle is joined, with most of the French infantry pushed back.  The sweep around the outnumbered French right forces a general French withdrawal.  
This is a costly win for the Allies with the score being 6 - 5.  The French pull back to a second ridge line as the Allies reorganise for a second attack.

Although the Allies were victorious, this turned out to be a more challenging battle, not helped by some rotten dice rolls by the Allies!


Wednesday, 3 July 2024

Massacre at Maltot

 Enthused by his initial wargame, Ben requested another game before he had to head off home.  We chose a Normandy scenario based upon the operation to secure the village of Maltot near to Hill 112.

Maltot village, held by elements of 272 Infantry Division and supported by 10th SS Panzer Division in reserve, was a key objective for the Allies, in order to secure the high ground over looking Caen, Hill 112.

Here is the centre of Maltot, with German defences extended forward into the hedgerows and buildings.

On the British right flank are the Churchill tanks of 9RTR, supported by 5 Wilts and a 25pdr battery in direct support.
The Germans have infantry, anti-tank guns and machine guns in defensive positions.
A feature on the German right flank is the Chateau, held by elements of 272 Infantry.
The British left flank consists of more tanks from 9RTR, 4 Wilts and another battery of 25pdrs.  There are also some Royal Artillery M10 tank destroyers and an air OP.
Ben kicks off with and armoured push straight into the village.
Unsupported, one of the M10s falls victim to a Panzerfaust fired from the buildings:
The same fate falls upon a Churchill that gets too close to the infantry in the hedgerows.
And a second M10 is taken out by a Panzer IV lurking behind a hedge.
Two Tigers from 10 SS rumble forward on the German left and make short work of another Churchill.
And further Churchill burns in the village.
Having rallied, more Churchills enter the village, having driven out the German infantry in the large building.


Attention shifts to the German right flank as 4 Wilts begin their advance:


German infantry destroy a Churchill at close range:
And the Tigers take out the last of the 9 RTR tanks on the left flank.

A third Tiger edges through the streets and scores a hit, destroying another British tank.


Just as things were going well for the Germans, Typhoons streak over the battlefield, however instead of attacking the German Tigers, they make an attack on the infantry in the Chateau, forcing them to retreat.
A second RAF attack takes out a Panzer IV by the Chateau.  It is clear that Ben is making a concerted effort to attack the German right flank.
In the centre, the 10 SS Tigers drive the British out of the village, destroying another Churchill in the process.
An artillery strike destroys the last defenders of the German right hedgerow:
And one of the Tigers is taken out, but it is too late, the British are forced back and Maltot remains in German hands.
The British commander draws out the mess Webley and goes off to do the decent thing....


A very interesting game, with some stark lessons learned.  Unsupported tanks do not fare well in close country, and the Allied airpower should have been directed at the Tigers.  The British artillery could have been better used to soften up the hedgerows.  As in real life, Maltot was a really tough nut to crack, but I am sure the same mistakes will not be made in the future.

The game was played using modified Memoir '44 rules, a mix of mostly Airfix figures and Roco tanks.

The Churchill tank memorial at Hill 112, Normandy